Translate

**If you have previously subscribed to received my posts via feedburner or Bloglovin, those are inactive now. To receive my creative updates, please subscribe in the right sidebar.**

Saturday, September 2, 2017

Summer #Cre8time Memories...


Hello friends! As summer comes to a close, one can't help but want to remember days adventuring at the beach. I love to create mini-books that house my photos and mementos from vacations... and I don't have to look far for finding something to create with – but for this keepsake... I've raided my pantry and refrigerator!


A set of vintage by the sea stamps by Rubber Dance Art Stamps are inspiration for the theme of my project which will be housed in a recycled cheese box that was in the refrigerator. I also raided my pantry for some paper boxes to serve as a sturdy base for pages.


I began by gently peeling off the package labeling to give me a blank slate to work with.


I measured a circle to fit inside the box and cut a template to trace out front and back pages from the recycled cookies/cracker boxes and from the corrugated packaging.


Then I distressed the outside of the box and both sides of the pages with an acrylic/gesso mix and also some spray mists – this gives a real white-washed beachy feel.


I also distressed some sheer organza ribbon and white cheesecloth with distress stains and spray mists... using them to mop up all the glittery goodness from the sprayed pages along the way.


I adhered some double-sided sheet adhesive cut to fit the pages and began to assemble my mini book. I sandwiched the ribbon and cheesecloth between the pages – adding some double-sided tape to the top of the ribbon to lock them in place when I adhere the top page.
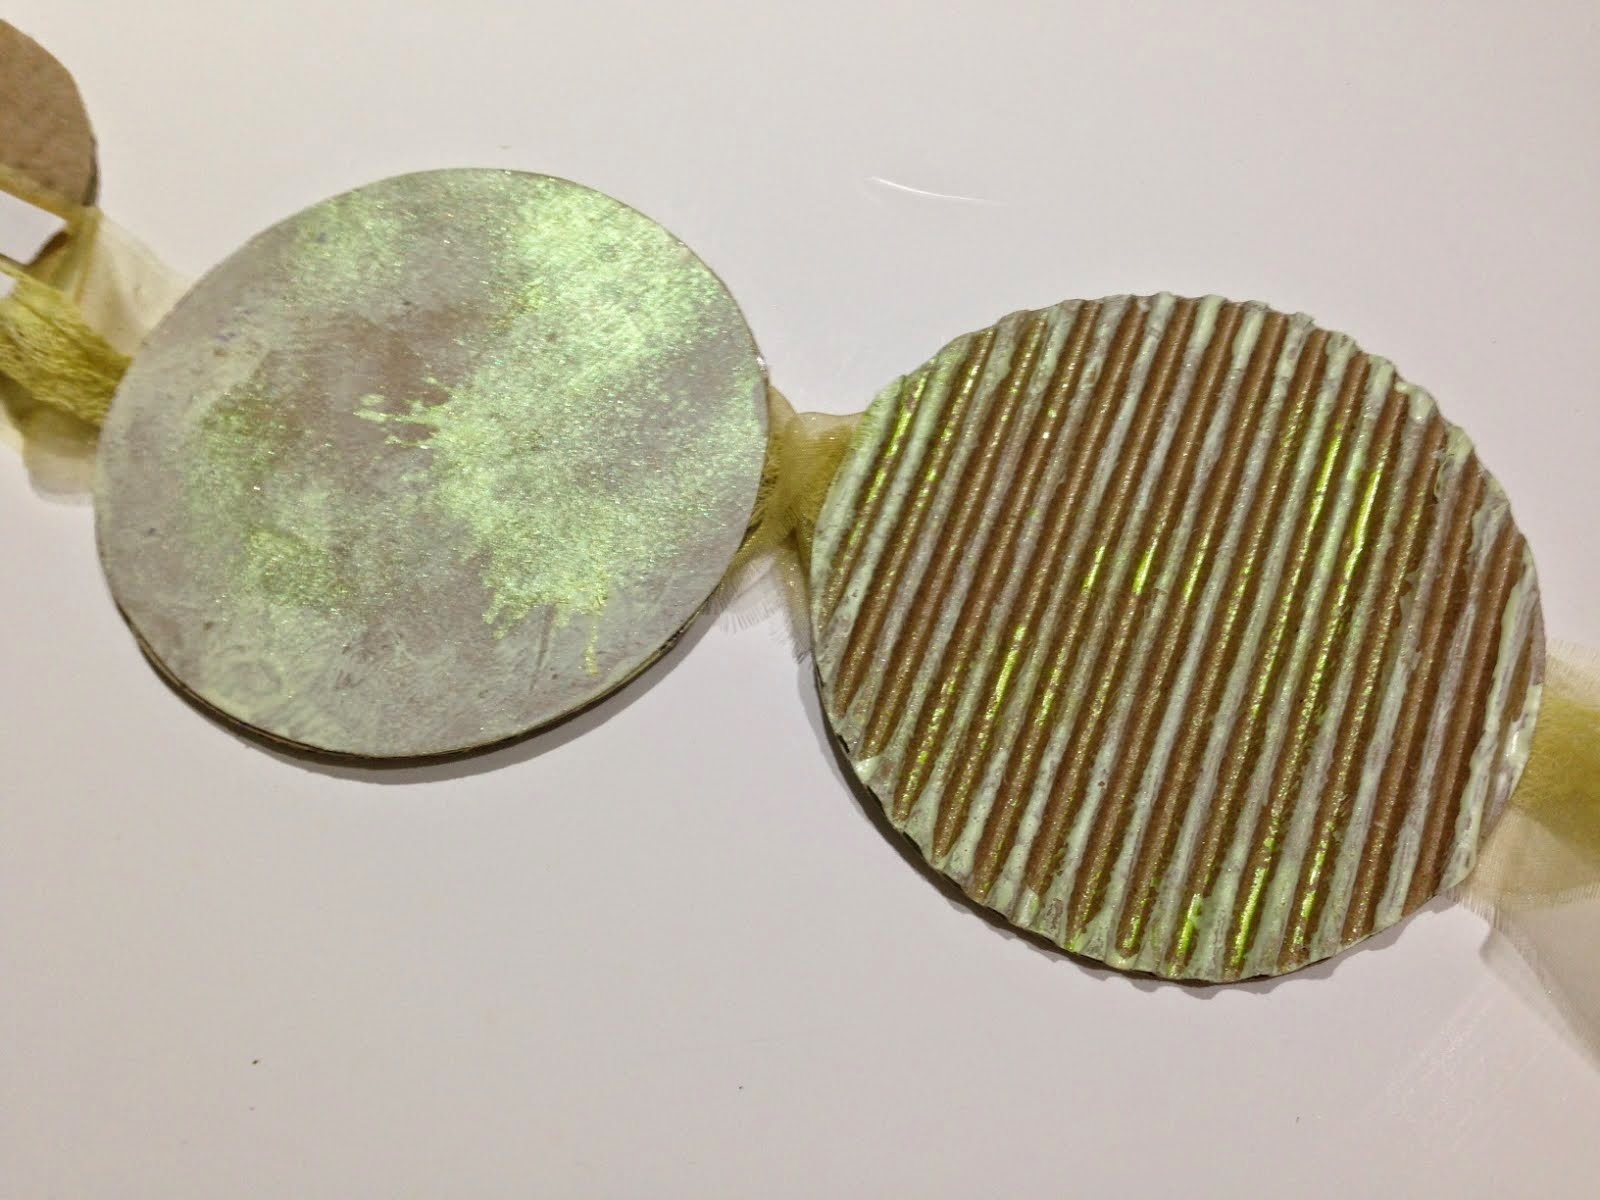


Between the pages, I added some knotted natural green dyed raffia.


I even used a recycled envelope for ephemera... nothing goes to waste! I distressed in the same fashion as the pages and adhered using circle cut double-stick adhesive sheets. I'm normally a glue-stick girl, but after all the painting and distressing, the double-sided adhesive makes assembly quick and easy.


I stamped my images using brown dye ink onto creme cardstock primed with the same acrylic/gesso base as everything else; then tearing each image out and distressing edges with chalk inks to complete the vintage weathered feel.


I layered onto the corrogated pages a section of distressed cheesecloth and one image adhered with tacky glue.


I added some antique gold dewdrop ink to the inside of the box and layered one of the images to the base, and blending the hard edge of the envelope and white box with the corrugated border around the sides... WOW this is so lovely!


Now for some finishing touches! A resin cast sand dollar colored with spray mists and antique gold ink; a recycled dry cleaning tag; section of cheesecloth; raffia stands; and some real mini seashells to complete the scene.


I accordion fold the book into a stack and nestle it nicely into the box. It's all grungy and weathered and looks like it's just washed ashore!

Memories by the Sea...


This cheese box has been transformed completely – one would never guess what it was when I began. Keep a lookout in your pantry, the fridge and your recycling for amazing and interesting things to upcycle into something beautiful and useful! I even have space leftover to add some of my vacation photos from Jamaica last fall.

I hope you have enjoyed my recycled stamped creation – I truly enjoyed making this keepsake. What would you recycle for use as a summertime keepsake?

Thanks for visiting! :) Sb

Friday, September 1, 2017

Keeping It Sharp... Quick and Easy DIY Teacher Gift with Etchall®


Hello friends! I have great news!! I am officially part of the Etchall® Ambassador Design Team. I am excited to be a part of this team and to share my etching adventure with you today with my first project!


Etchall® tickles my GREENcrafting heart as it makes customizing everyday items quick, easy and fun -- and it's not just for glass... Etchall® etches on glass, mirror, ceramic, porcelain, marble and slate! Of course, I will be trying out all of these surfaces.


Today I'm sharing a quick and easy DIY Teacher gift using Etchall®... a custom etched vase filled with sharpened pencils and some extra rulers {for good measure - LOL}! 


You can use a vase or recycled jar around the house - for my project today I've picked up one for $1 at the Dollar Tree. Add Etchall® a surplus of pencils, a couple rulers and pink erasers and this I will have a fabulous teacher gift for the new school year ahead... all for under $10. 

Supplies needed:
  • Etchall® Glass Etching BEE-Ginner Kit
  • Alphabet stickers {from Dollar Tree}
  • scissors
  • recycled plastic fork
  • Cyclindrical vase {from Dollar Tree}
  • lots of pencils
  • a few rulers and some pink erasers
  • plastic palette knife

Etchall® is a REUSABLE, easy to use etching créme that creates permanent etched designs on large or small areas of glass, mirror, ceramic, porcelain, marble and slate. No curing, or drying required... it just takes 15 minutes! CLICK HERE to read more about this fantastic ACMI Certified product.

For my project today I have used items from the Etchall® Glass Etching BEE-Ginner KitIt has everything you need to get started... and in just 15 minutes will have you hooked on etching everything under the sun! 


First I cut a real thin strip of the transfer paper to use as a straight guideline to place my sticker letters upon the vase. There is a nice grid pattern on the back that helps with measuring and cutting.


I've selected some chunky foil letter stickers that are in my stash that are from the Dollar Tree. Since these stickers are a metallic foil and not paper stickers, I'm confident that the Etchall® Etching Creme will not be able to penetrate and work as a perfect letter mask. I used the detail pick tool to pick up the letters from the sticker sheet and place them onto the glass. Using the tool helps with application and keeping your fingers from dulling all the stickiness.


I place the letters spelling out backwards "SHARP!", then remove the guideline and reapply just above to spell out the remaining words "KEEP IT".


I use the squeegee tool to burnish down the sticker letters real good to ensure the etching creme doesn't seep under the edges. 


After all the letters are placed and burnished down, I add a couple of vinyl stripes to mimmick the six sides of a pencil; alternating etched and unetched areas; and then I am ready to etch! 


Using a recycled plastic fork, I scoop out and apply the Etchall® Etching Créme to the vase like I'm icing a cake - making sure a nice even layer is applied, then repeat to each section of the vase. 


I set this aside for 15 minutes while I sharpen three boxes of pencils. Sharpening that many pencils by hand actually took longer than 15 minutes... no worries -  the Etchall® Etching Creme stops itself so if you run a little longer everything is A-OK.


After 15 minutes {or more like 30 minutes} I return to remove the Etchall®. Nothing goes to waste here... this is totally recyclable!!! Using the squeegee tool I scrape the I scrape away the Etchall® Etching Créme and what's leftover goes back in the bottle.


Gently scrape away and drop the Etchall® Etching Creme right back into the container! This little bottle of créme can be used over and over again.


Once all of the Etchall® Etching Creme is removed, wash the remaining residue completely from the glass with just plain water. Gently pat dry with a soft cloth. 


Now peel away the transfer sheet...


and use the detail pick tool to peel off the sticker letters {which worked perfect as a resist mask with the Etchall® Etching Creme}.


LOOK AT THIS ETCHING!!!


Now to embellish this stylish and beautiful etched design with some pencils, rulers and erasers. 


A perfect compliment for the teacher's desk
with an inspirational message!

The best part... I did it myself. While I waited 15 minutes for the Etchall to do it's magic - I sharpened all the pencils {by hand} which took longer than the whole etching process. I love how this turned out and I have to admit it looks pretty sharp, too!


What DIY gifts do you make for teachers?


You have the Etchall® Etching Creme, but you need some "odds n' ends" {lights, tools, etchmask, etc}... This month Etchall® has a special coupon to pick up your odds n' ends at Etchall® -- this includes the designer tipkit, resist gel, bottlelight, etchmask, tools, and accessories! Use coupon code ODDSNENDS for 20% off select items.

+++++++

Stay tuned for more ideas on transforming items with Etchall®! :) Sb

** This is a sponsored post. Etchall® has provided products for use in this project in exchange for my creative ideas, views and opinions. My ideas and opinions are my own.

Thursday, August 24, 2017

Tie up Your Cre8time with a BOW... DecoFun™ Bow Maker Challenge with Designer Crafts Connection


Hello friends! Today I am part of a special bloghop with the Designer Crafts Connection as we explore all the fun ways to decorate with ribbons and BOWs. Today's challenge is taking us over the pond with DecoFun™ Bow Maker - the original British bowmaker. Learn in minutes... fun for a lifetime!


I don't know about you, but I use bows on just about anything and everything... cards, gift boxes or baskets, wreaths - you name it! Bows are the finishing touch and how wonderful is it to have a tool to make bows quick and easy out of any color or size ribbon to match ANY occasion. I love making my paper ornaments, so today I'm going to share how I complete one of my handmade creations and get a jumpstart on my handmade holiday giftwrapping too!


No more fussing about trying to tie a perfect bow... the DecoFun™ Bow Maker makes bowmaking so easy... and FUN! This easy bow making tool is better than a bow-making machine and I figured out that I can also use it to make tassels, too. I was provided with the DecoFun™ Bow Maker Basic Kit and an assortment of six lovely ribbons to make bows with.


I started by finishing a folded paper ornament that I started a while back. I followed a pattern from "The Origami Handbook" by Rick Beech. When I made the smaller version I knew exactly what I wanted to do with this style. I want to make an oversize version where I can dangle a vintage ornament inside. This is made from 12 folded segments  a metallic green cardstock and NO-GLUE. 


With the base shape complete and ornament installed from center with a thin piece of wire fed down from top... I'm ready to start embellishing!


I start winding the 1 1/2" red/white stripe wired ribbon around the DecoFun™ Bow Maker. Visit the DecoFun™ Bow Maker YouTube Channel for ideas.


Wrap ribbon through the prongs following the simple directions in sort of a figure 8 fashion until I use all of the ribbon on spool. Just three steps and you are done!


I use a provided silver twist tie wire to wrap around center and secure. There is even a little recessed area in the center where you can slide it right underneath the ribbon. Remove ribbon bundle from tool.


I set this aside to make another layer with other colors.


I layered two ribbons into the DecoFun™ Bow Maker -- a 5/8" sparkle green satin layered upon a 1 1/2" red wired satin ribbon. Then I gently opened up the prior ribbon bundle and layered it at the back and twisted them altogether. I trimmed the loose ends and pulled all the sections apart to form a puffy bow. I will fluff it more when I place it atop of my ornament.


Now to make the tassel! I remove the supports and move out the prongs to the match the desired length of my tassel. I just eyeball how long I think the tassel should be in relation to the size/scale of my ornament.


I wrapped the thread around and around the prongs, using the entire skein. Before removing, I fed a reserved strand to tie off a hanger at the top of the tassel and added a few coordinating beads from my stash.


To complete the tassel, I took another reserved thread to tie off the "puff" on the top of my tassel. I wrap the thread around both sides of the wrapped thread about 1/2" from the side I tied the beaded hanger. I tied a tight knot, then wrapped thread around several times, then tied knot. I gently slid the thread off the prongs and trimmed the bottom. After straightening all threads and giving a little trim my tassel is complete!


I fed the thread of the tassel up through a tiny hole made in the bottom point of the ornament, secured within the folds with a small piece of tape.  


The finishing touch is to tie the bow on top with the wire I attached to suspend the vintage ornament, then give a final fluffing. WOW!!! Because of the large size of this ornament and I don't want to disturb my beautiful bow, I'm using clear fishing line suspended through the middle of the ornament so that it hangs level.


A diamond full of holiday cheer!


What a statement piece this is!! I have a corner in my living room where I can hang a cluster of these, I'll just need to install a few ceiling hooks when the holidays arrive. Even paired with another lantern from a sheet of folded 12x12 patterned cardstock looks so lovely... and the puffy bow on top makes complete.


CLICK HERE to pop on over to Designer Crafts Connection for more ideas and inspiration using the DecoFun™ Bow Maker... fun for any and all occasions!


 +++++++


Thanks for dropping by and I would love to hear how you embellish with ribbons and bows! :) Sb

** This is a sponsored post. The Ribbon Place has provided the DecoFun Bow Maker and ribbons for use in this project in exchange for my creative ideas, views and opinions. My ideas and opinions are my own.
