Translate

**If you have previously subscribed to received my posts via email: Please subscribe to my posts via Bloglovin in the right sidebar.**

Saturday, July 27, 2013

Viva Las VegaStamps! and Genuinely Jane Studios BLOGHOP Day 2... Halloween Mini Book


Hi Everyone! Welcome to the weekend - it's Saturday and WELCOME! Today I am featured in this special 4-day bloghop happening with Genuinely Jane Studios and Viva Las VegaStamps! Please take time to check out each day of inspiration from this mixed-media extravaganza... and there's blog candy to be won, too!!! If you missed day #1 - please CLICK HERE.


From Friday, July 26th through Monday, July 29th enjoy hopping through designer's blogs from both Genuinely Jane Studios and Viva Las VegaStamps! to see fabulous stamped wooden albums. Visit each day and show some appreciation to our artists for sharing their work with.. there's something in it for you - blog candy!!! 

To be entered to win on the PRIZES... please leave comments each day on each post to be entered to win! Genuinely Jane Studios is giving away a $20 gift certificate to purchase some of their GORGEOUS wooden albums, and Viva Las VegaStamps! will be sending one lucky commenter a POUND of unmounted rubber! You can't beat that!!!

If you've just arrived here...
CLICK HERE to jump on over
to Viva Las VegaStamps! for today's bloghop.

My project for today is full of inked and stamped goodness... and SPOOKY - too!

I created this haunted accordion book using two sections of the Genuinely Jane Studios Wood Book - Square With Star Cut Out - G102 Size: 4 x 4" for the covers of this Spooky Stamped Mini Book. The wood pages are covered using misted brown paper mounted using VLVS! MIRACLE SHEETS; then overstamped with layers of barbed wire background #5793... just to start! The inside accordion pages are a plethora of inky stamped goodness using loads of VLVS! stamps and a SURPRISE awaits on the back cover. Please read on for a little how-to of how I got the stamped detailing on the cover and more of my book...


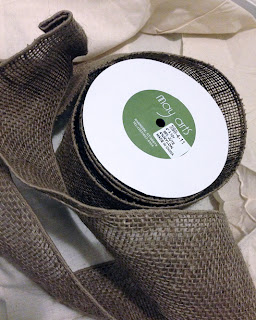
I started with some seasonal paper scraps, the Genuinely Jane Studios Wood Book - Square With Star Cut Out - G102 Size: 4 x 4" and some blank cardstock and my stash of Halloween
Viva Las VegaStamps!


Misted and painted crumpled brown paper will cover the wood base pages to house my accordion.


I taped over the holes with masking tape to create a flat surface and adhered to backside of painted paper using a pre-cut section of MIRACLE SHEET.


I cut the paper with approx. 1/2" overhang, then used Miracle Tape around the edges.


Making nice hospital corners, I wrapped the edges around to create the front and back cover. I repeated these steps to cover the other panel with the star cutout {see below}.


Originally I had started with an accordion cardstock of natural/creme color, but it was too stark with the beautiful covers. So I quickly cut, scored and assembled another out of chipboard using more sections of MIRACLE SHEET {I LOVE THIS STUFF}. Then using several Ranger Distress Inks colors, I rubbed ink pad to paper in liner strokes to create this faux wood grain that has loads of depth and detail. My hands are permanently orange for the weekend, too! Setting this aside to dry, I got to work on my covers again.


Using the barbed wire I stamped it in pigment ink and then applied a rust embossing powder. This is before I heat set. After I heat set some of the detail was lost as the embossing powder was very distress-like and pretty much covered everywhere - even the negative areas.


So I inked up the stamp again and applied more barbed wire right on top, then heat set again. This made for nice depth as some of the detail stayed forward and some of the newly stamped image blended into the embossing powder. I never reapplied more EP.


This is the completed front cover after a third stamped layer and heat setting. I finished up by adding some faux barbed wire decor from the Dollar Tree and a salvaged vintage cabinet knob. 


This is the back cover wrapped the same way. Because I am making this side a shaker star, I left off the barbed wire detail... I have something else in mind. I lined the backside with one of my patterned paper scraps and ran a bead of Diamond Glaze in the edges to seal the cracks so my confetti doesn't get lodged there in the Miracle Tape.


I have a fun selection of seasonal confetti - they are fun for all kinds of projects and perfect to make shakers. I selected some stars and other shapes and also a few colors of seed beads. To seal up I ran a bead of Diamond Glaze near the outer edge of the star shape then took a toothpick to spread it close to the edge - being careful not to let it seep over the edge. I waited a couple minutes for it to begin to set up, then I applied my acetate stamped with the Oct. 31 #18899, Fancy Spider Web Corner #19208, and Spider #16794 all Viva Las VegaStamps! in Jet Black StazOn ink. I added doodle accents with a black and white pen, and also my fav Sakura of America Gelly Roll Stardust Clear Pen. I set an acrylic block on top to give even pressure to the Diamond Glaze and left to dry for a little bit.


I finished off the edges with some fiber wrapped black metallic pipe cleaners and screwbrads that have the same rusted embossing powder treatment.


There is so much more inside this book - stay tuned for another post {or two} with more from this little gem!

****************

Please use these links to visit all the stops on today's hop - remember to leave comments at each stop, each day to get entered to win the blog candy.

VLVS! (http://vivalas.blogspot.com/)
Susan (http://sbartist.blogspot.com/)
Ildiko (http://www.thecraftinmama.blogspot.com/)
Hermine (http://herminesplace.wordpress.com/)
GJS (http://www.genuinelyjanestudios.com/blog/)

Have a wonderfully creative weekend. I hope you are inspired to get in your studio and PLAY!  :) Sb

Friday, July 26, 2013

Viva Las VegaStamps! and Genuinely Jane Studios BLOGHOP Starts TODAY!!!

Hi Everyone! It's finally Friday and there is a special 4-day bloghop happening with Genuinely Jane Studios and Viva Las VegaStamps! I am part of the bloghop tomorrow - BUT - you don't want to miss one day of inspiration from this mixed-media extravaganza... and there's blog candy to be won, too!!!


Starting today through Monday, July 29th you will hopping through designer's blogs from bothe Genuinely Jane Studios and Viva Las VegaStamps! to see fabulous stamped wooden albums. Visit each day and show some appreciation to our artists for sharing their work with.. there's something in it for you - blog candy!!! 

To be entered to win on the PRIZES... please leave comments each day on each post to be entered to win! Genuinely Jane Studios is giving away a $20 gift certificate to purchase some of their GORGEOUS wooden albums, and Viva Las VegaStamps! will be sending one lucky commenter a POUND of unmounted rubber! You can't beat that!!!

CLICK HERE to jump on over
to Viva Las VegaStamps! for today's bloghop.

Have a fantastic Friday. Don't forget to drop by tomorrow to see my creation!  :) Sb

Sunday, July 21, 2013

All is Merry and Bright... Celebrating Christmas in July with Anything But a Card Challenges #24


Please take a moment to subscribe to my posts via email or bloglovin' in the right sidebar since google reader will be gone any minute now.
 
Hello! Happy Sunday everyone! I'm so excited to for this new Anything But a Card Challenge... Challenge 24 is "CHIRSTMAS in July". I'm so excited for this theme, because I'm ALL ABOUT CHRISTMAS and I haven't created any Christmas themed crafts at all yet in 2013. Last year for my Unscripted Sketches projects, I worked in the holiday spirit ALL year. Yep - that's right, 52 Christmas projects last year - many of them GRINCHY, too!


Last year, my mom knitted me this "OFFICIAL" Elf Hat for Christmas complete with lights. Isn't it great!!!

The new Challenge... Anything But a Card Challenge 24 has fallen on the Eve of  "CHRISTMAS in July". So this theme gives everyone a chance to jumpstart their handmade holiday crafting projects. Anything Goes with this theme! Have fun creating your Hanukkah (Chanukah) or Christmas projects and get your giftmaking done E-A-R-L-Y! Just remember create anything except a card... and to have FUN!!!


There's two weeks to play along and link up via inlinkz froggy. Anything But a Card Challenges is a bi-weekly challenge and today, begins a new challenge. Our wonderful Design Team showcases their Challenge 24 "Christmas or Hannukah" inspired projects today. Please click here to head on over to ABAC and see the wonderful projects shared by the design team AND submissions by all of you.

REMEMBER this challenge blog is ANYTHING and EVERYTHING... except for Cards. ATC's aren't greeting cards...so please link up your ATC's, too!!!

Since I was little we always made ornaments and other goodies for the holidays - and it still rings true today. I love making ornaments and these first two ornaments are made from vintage cookie cutters. These cookie cutters are a little tattered and rusty, but full of charm. So I have creatively repurposed them to live on my Christmas tree all glittery adorned with May Arts Ribbons.


This vintage candy cane cookie cutter has been transformed into a gorgeous sparkling ornament. This sparkles and shimmers from every angle!

This revamped vintage snowman cookie cutter is now an ornament that is as sparkly as Frosty the Snowman's personality.


Finally, this is a handmade paper tree made of two triangles cut from collaged painted papers and embellished with May Arts glittery goodness. This tree is 4" x 6" size and folds flat to fit perfectly into a 5" x 7" envelope so it can double as a Christmas card.

May Arts Ribbon used: Green String SJ15; Red Metallic Velvet 377-38-14; White Curly Sparkly SE01; Silver Metallic SL55; and Gold Metallic Crochet: HP30.
 
Thanks for dropping by. I hope you have a fabulous day... I'm preparing for my monthly ART Club meeting - and I may ACTUALLY free my Gelli Plate from it's packaging for the first time!  :) Sb

Saturday, July 20, 2013

This Gift's For You... Sketch-It Saturday with Unscripted Sketches #220


Happy Saturday! It's the weekend which means it's time for Sketch-It Saturday with Unscripted Sketches! Today we debut a brand new sketch #220. For my fun and festive card, I've turned the sketch 90º and made it vertical.


This was a quick and easy card using patterned paper scraps received from my Scrap Swap Group. One section was a pattern with these glittery gifts printed on them, so I cut them out to use as embellishments since it was too small to use for anything else. I really have fun putting similar colored patterns, elements and embellishments together - and all mounted with miracle tape onto a blue cardstock base... I've got another greeting card ready for the HANDMADE card box. The swatch of orange grosgrain ribbon is the finishing touch and that extra little detail to make it "POP"!


What is Sketch it Saturdays at Unscripted Sketches? Every Saturday morning a new sketch is posted for the week. Flip the sketch, rotate it… create a card, a scrapbook page, a wall hanging, digital, paper, fabric, paint, anything your imagination comes up with! There is no right or wrong way, as long as you are using the Unscripted sketch as the inspiration for your creation! And everyone is invited to join in the fun... and post your creation on their page via inlinkz for all the world to see!

Thanks for dropping by. Please take a moment to subscribe to posts via email or bloglovin' in the right sidebar since google reader will be gone any minute now. I hope you have a fabulous weekend - the month is flying by and my monthly ART Club is tomorrow - YAY!  :) Sb

Thursday, July 18, 2013

You Are My HAPPY... Art Journaling with Unscripted Sketches #219


It's mid week... {again} and I wanted to share my latest project using this week's Unscripted Sketches - sketch #219. This sketch was a bit of a challenge for a card and I wanted to use this "You Are My Happy" die cut embellishments from DCVW. I received this in a goody box from a crafty friend and decided it WOULD be in this week's project. So I made an art journal page instead. I found a scrap of patterned paper with the same coloring and punched the snowflakey circles with a Martha Stewart border punch and layered to mimick the sketch.


My husband and I went on a weekend getaway to the races in Daytona last weekend and this page is commemorating our time together. We both have very busy schedules and when time allows us to get in some quality time... we take full advantage of every minute.


The base was leftover red spray mist I picked up off my craft sheet; overstamped with dictionary page and chicken wire stamps from Viva Las VegaStamps!. I layered my die cut and punched pieces, ran all through my Xyron 510 sticker machine, and adhered - then set off for to doing some leisurely hand doodling... PURE FUN! I finished it off with a small photo from our weekend away {I get tons of arguments for taking pix TOO much - but this was a winner} doodled up to match and a "LOVE" button that just happened to be in my marker bag {adhered with my Xyron "X" sticker maker}. Perfecto!

What is Sketch it Saturdays at Unscripted Sketches? Every Saturday morning a new sketch is posted for the week. Flip the sketch, rotate it… create a card, a scrapbook page, a wall hanging, digital, paper, fabric, paint, anything your imagination comes up with! There is no right or wrong way, as long as you are using the Unscripted sketch as the inspiration for your creation! And everyone is invited to join in the fun... and post your creation on their page via inlinkz for all the world to see!

Thanks for dropping by. Please take a moment to subscribe to posts via email or bloglovin' in the right sidebar since google reader will be gone any minute now. Have a great evening! :) Sb

Sunday, July 14, 2013

FREECYCLING Studio Wall Art – May Arts Ribbon Design Team - Round 2 Submission Burlap Transformed into Faux Pallet


Today is the big day - time for my Round 2 submission for May Arts Design Team. I would like to take a moment to thank Bethney, the Ribbon Lady for this opportunity and for enabling me to go ahead with this large project, as I needed a lot of ribbon for my wall art.


I started out on a venture to create a wall hanging with a summer theme... then my greencrafting gene kicked in! Remember the good old days when HGTV actually had shows that were interesting... Freestyle, Design on a Dime, Decorating Cents and others. I used to watch HGTV almost exclusively - every night. Nowdays we have Pinterest to fill our DIY cravings.


I loved that show Freestyle, where they would redo a room in a place by only shopping around for items already in the homeowner's house - it was great! So I planned to take an old frame that has been hanging in my spare bedroom {for nearly 10 years}. A leftover from my art supplies and canvases from my art studio days that now reside in our spare bedroom {aka storage}. We had open houses monthly, so I kept framing and canvas stretcher bars on hand to finish off new works quick and easy. This was one of those frames - and - due to it's large size, it remained artless. NOT ANYMORE!

So here is where my artful shopping begins... 

I grabbed the frame, my spool of 4" May Arts Burlap and an offcut of natural color muslin - and set off to make my recycled pallet inspired wall art. 


Photo from Wikipedia under description of Pallet

To give the strips of burlap some stability, I needed a base so that when wrapping the centers won't sag. Easy enough, I'll stretch the muslin over the frame like a canvas with my staple gun and then I'm ready to go. Not so fast, crafty girl! 


The muslin looked stark white next to the jute coloring of the burlap so off to shop the stash - looking for something to paint or dye my fabric brown. I ended up in the kitchen to polish off my morning java and a LIGHTBULB went off... use the morning's leftover coffee.


So I grabbed a bowl, bunched up the fabric and poured in the coffee grounds and the leftover coffee. I added a little more water, to completely saturate the fabric. Since my coffee is BUSTELO, a super strong, dark espresso it should work perfect. I mixed it all around and popped it in the microwave to warm up for a couple minutes, then rinsed.


I stapled the damp fabric to the frame as you would stretching a canvas; working from the center on the horizontals across from each other, then repeating with the verticals. One... two... three... four... REPEAT. Over and over, one staple at a time, round and round until it's perfectly stretched. CLICK HERE for how-to on traditional canvas stretching. As the fabric dries, it will shrink and tighten to the frame. When dry I hammered staples down.


The new color is a very close match to the burlap, now I'm ready to transform this frame into some inspirational wall art.

You could certainly skip all these steps by using a store bought stretched canvas and coloring to match burlap. I only went through all these steps to use/repurpose things I have on hand.

I've got a great quote that will be perfect to keep me motivated in my studio:


“You can’t reach for anything new
if your hands are still full
of yesterday’s junk.”
~ Louise Smith

I gathered from my stash the May Arts 4" wired Burlap, Ranger Distress Ink, Ranger Adirondack® Acrylic Paint Dabbers, Technique Tuesday Clear Cling Letter Stamps, Helmar Fabric Adhesive, a couple sheets of Basic Grey patterned paper, Glue Dots® and my button stash {to fashion some nailheads}.


I cut nine sections of the wired burlap to the frame width, leaving about 3" overhang off the edges. Then I distressed the edges of the burlap using Walnut Stain Ranger Distress Ink. This will give the look and feel of wood beams.


Next I grabbed my magical box of buttons and selected about 50 similar sized buttons to paint to create faux nailheads. It doesn't really matter what color they are since I can paint them to match my project.


on the buttons in Espresso, Silver then black.


**A TIP** I applied small Glue Dots® to the back of each button and stuck them on a recycled sticker backing to hold them in place while painting and when dry, they will be ready to apply to my project.


Using Helmar Fabric Adhesive, I glued each strip to my fabric covered frame, leaving the overhanging edges loose. When the entire canvas was filled, I folded back the overhang and stapled in place to give added dimension for these faux wooden planks. 


The finishing touch was to hand stamp my quote. I used Technique Tuesday Big Timber letter stamps and Black Soot Ranger Distress Ink stamped onto a light blue mottled Basic Grey patterned paper. I hand cut each of the letters and applied to the faux palette with Glue Dots®


I adhered the sticky button nailheads and my new studio inspiration is complete. I was planning to give it a weathered, whitewashed look... but it looks so amazing just like this. In this case - less is more.


My RENEWED studio inspiration...
I hope this project inspires you to create something with ribbons and fiber! Feel free to cut it, ink it, and knot or glue it! The possibilities and uses are endless...and only limited by your imagination. 

I'm crossing my fingers that I'll be selected as one of the next May Arts Ribbonistas. Have a great evening and see you tomorrow for Sketch-it Saturday with Unscripted Sketches. 

What are you crafting for Christmas in July???  :) Sb

Blog Widget by LinkWithin