


Hello friends... March is National Crafts Month and St. Patrick's Day is right around the corner! Today I'm sharing a quick and easy ribbon rosette project that is perfect for pinning on the winning float at the annual St. Patrick's Day Parade!

For this project I gather a few supplies: gold oly*fun® metallic fabric, scrap of green cardstock, scissors, paper trimmer, hot glue, Scor-Pal®, double-sided adhesive sheets; and fun Irish themed button flair, embellishments and stickers from my fav dollar store.
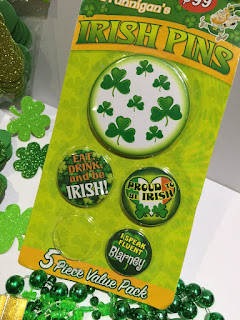
I have these pins from the dollar store in my crafty stash that would be perfect to transform into ribbon rosettes using gold metallic oly*fun® -- a fun reflective fabric that adds the perfect amount sparkle & shine to cardmaking and other craft projects!!

To make fabric a bit stiffer to fold and hold shape, I mount to green cardstock.

On a scrap of 6" x 9" green cardstock, I placed a cut-to-size section of double-sided adhesive sheet, removed backing, then mounted piece gold oly*fun® and trimmed back the edges.

Following pattern for making rosettes using my Scor-Pal®, I scored both sides of the paper-backed fabric to create peaks and valleys at 1/2" increments.

I divide this scored sheet into three, 2" sections, With some double sided tape, I joined the three sections together into one long strip. Fold back and forth on score lines to make the accordions. When shaped this will make a large rosette to set off my 3" button!

Now the fun begins! Shape the according into a circle and glue in place. It seems to take about 4 hands to form and hold a rosette down to secure, but once you do it a time or two it's pretty easy. For this I apply a ring of hot glue around the edge in the center and placed a faux gold coin on top... Ta-DA! Hold coin in place until glue cools and it is secure then repeat on other side.
I fashion a ribbon tail out of another section of oly*fun® backed cardstock, a smaller section popped up on chipboard cut on my guillotine paper cutter... easy-peasy! Glue the feature button pinback onto the front of the rosette, and added some fun foamy & glittery shamrock stickers to finish things off. Place a sticky back wall hook on the back upside-down and it's ready to hang on the winning float!

I just love the shimmer and shine of the metallic oly*fun®! I can't wait to be ShamROCKin' this over to award to my favorite float at the St. Patrick's Day Parade!
A ShamROCKin' Award....

What are you creating during National Crafts Month?! I'm enjoying the art of cut paper and glue over at the Collage-Lab SPRING FLING Virtual Retreat... you can still join the fun -- all classes are accessible until December 2022.

Thanks for stopping by and have a great day! Clover on over to the Designer Crafts Connection blog for more fun craft ideas!
Happy creating! :) Sb


No comments:
Post a Comment
I would love to hear your thoughts and comments...