


Hello friends! I'm back with another project... that I planned on!! LOL! Yes indeed I'm on my way to becoming a planner nerd now. I'm starting with getting my planner together and I'm so thrilled to be able to share this with you.
Follow along as I share how I upcycled a Vintage Ledger into an amazing Purple-liscious Planner. Several of the supplies I've used in this project were provided from Sakura of America, Testors and Therm•o•web as part of the the Favecrafts Best Blogger Craft Event.


I have been wanting to start using a planner for some time, though I haven't really found one that spoke to me. I always buy one of those day-to-day calendars and they go unused. This year I decided no more and I would make an official planner.
While volunteering at my local artist salvage center, Trash to Treasure, I came across a vintage ledger - complete with a six ring mini-binder, unused grid pages and tabbed dividers. A match made in creative heaven! This ledger has been recycled into an amazing purple-iscious planner with some supplies from my craft stash, Testors One Coat Lacquer and iCraft Deco-Foil.
While volunteering at my local artist salvage center, Trash to Treasure, I came across a vintage ledger - complete with a six ring mini-binder, unused grid pages and tabbed dividers. A match made in creative heaven! This ledger has been recycled into an amazing purple-iscious planner with some supplies from my craft stash, Testors One Coat Lacquer and iCraft Deco-Foil.
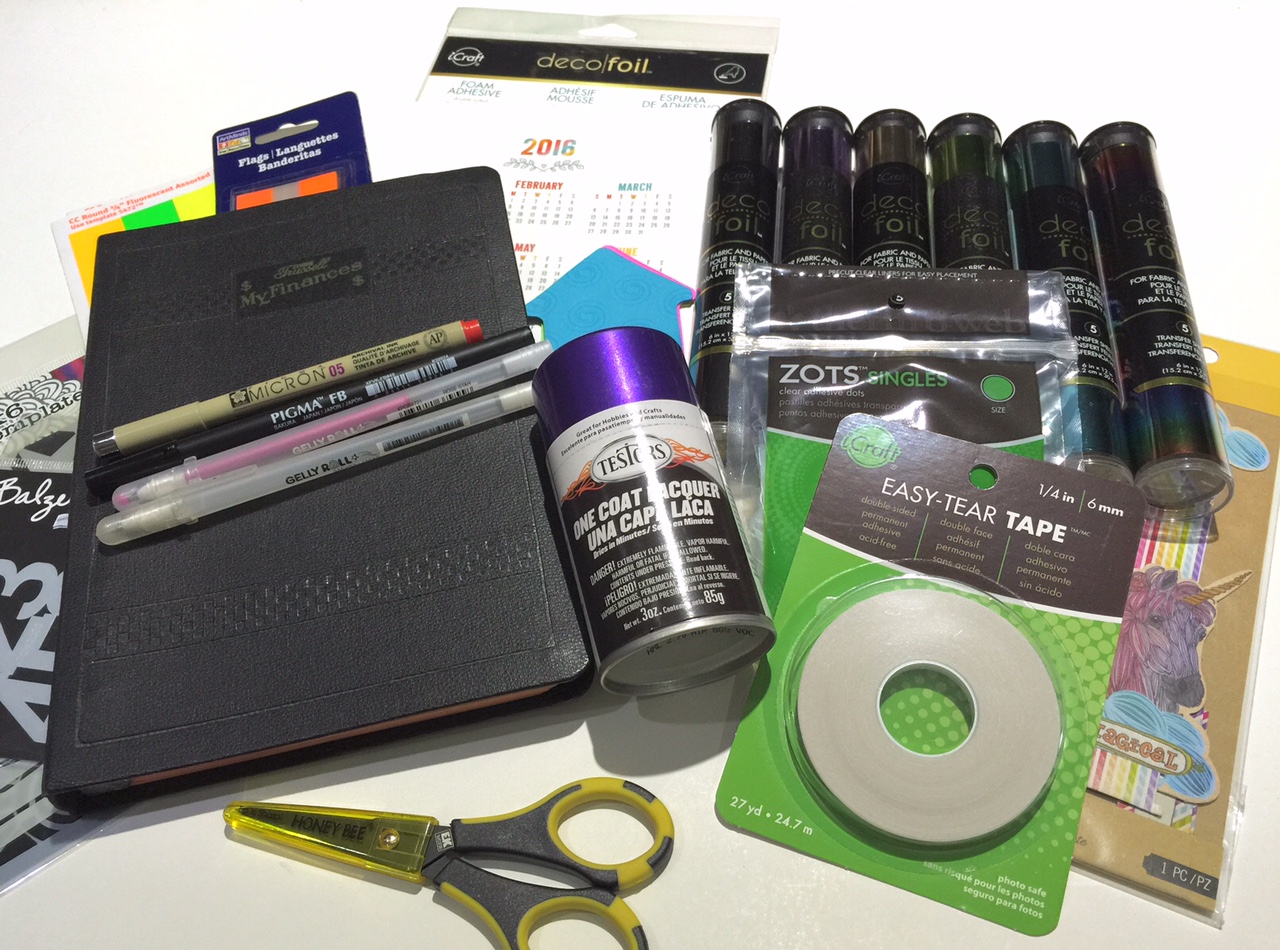
I gathered all my tools and supplies. Remove contents of ledger and mask off inside with a sheet of tissue leaving pocket exposed. Imagine my luck... I was sent my favorite color {thanks Testors}!!! Now if I could just get my MINI Cooper this same color – just putting it out there to the universe.

Mask off edges of stencil to protect exposed binder pocket and spray checkered border with the Purple-licious Testors One Coat Lacquer. Remove stencil and let dry. Flip ledger cover over and completely spray Purple-licious. Set aside to dry. My apologies I don't have pix of the spray painting... I did this outside quickly as it was getting dark.
Suprisingly with the heat and high humidity, this paint dried much quicker than I expected. Most was dry to touch in about 10-15 minutes – but I left it to dry for about an hour while I went ahead and worked on the contents of my planner.
Suprisingly with the heat and high humidity, this paint dried much quicker than I expected. Most was dry to touch in about 10-15 minutes – but I left it to dry for about an hour while I went ahead and worked on the contents of my planner.

Alter tabbed dividers by cutting strips of iCraft Easy Cut Adhesive sheets to width of tabs. Trim to size and apply over tab, folding around to backside. Burnish down with bone folder.

Using mini guillotine cutter, cut strip of iCraft Rainbow Deco-Foil about 1/4" wider than tabs. Remove adhesive backing on tab and align Deco-Foil strip with edge of tab and wrap around backside, completely covering exposed adhesive. The tabs are blingy and totally transformed. Each tab continues with the next color of the rainbow and just makes one happy.


I used two strips of the Rainbow Deco-Foil... nothing goes to waste! No heat, no wet adhesive, and super quick – so EASY PEASY!! I have 5 other colors and I can't wait to use them on more projects.

I added fun pockets with mini bags folded over, edges adhered and mounted to dividers using iCraft Easy Tear Tape. Now I'm ready to put everything back together. Even my post-it stencil masks have made it into my planner!

I cut my downloadable planner pages to size and punched holes for this six ring binder configuration. This binder is about 1/2" so it may only fit two months at a time for day-to-day pages. I'm OK with that. I replaced all the pages into binder, adding ephemera, clips, stickers and other planner goodies. I have loads more, but I'm just a newbie here. I will share more as I work along.
From Vintage Ledger to
Purple-liscious Planner...

The transformation is complete and it's time to plan more crafty goodness! I plan to use my Sakura of America Pens to doodle and color the inside of the cover. I LOVE how the cover is transformed from the blah black to this amazing purple-licious!!!
Supplies Used:
- Vintage Ledger {or an empty binder}
- Testors One Coat Lacquer - 1842 Purple-liscious
- iCraft Easy Cut Adhesive
- iCraft Easy Tear Tape
- iCraft Deco-Foil - Rainbow
- The Crafters Workshop Dylusions Chequered Dots Stencil
- Mini Guillotine Cutter
- Scissors
- 1/8" hole punch
- Downloaded planner page inserts
- Bone Folder
- Misc. selection of Sakura of America Pens
- Assortment of stickers, clips, post-its, mini bags, and other ephemera
This is an easy project - though consideration should be taken for use of spray paint and have time allotted for drying. Project can be completed in an evening and will continue to evolve over time as entries and journaling added. I know I'm going to have fun with my NEW "old" planner.
Thanks so much for visiting! I hope you drop by and check out all the Favecrafts Best Blogger Craft entries when the voting begins on March 31st. Happy Creating :) Sb


No comments:
Post a Comment
I would love to hear your thoughts and comments...