Translate

**If you have previously subscribed to received my posts via feedburner or Bloglovin, those are inactive now. To receive my creative updates, please subscribe in the right sidebar.**

Thursday, May 14, 2015

Cooking up some #AlteredBook Fun for Unruly Paper Arts Reader's Art Quest


Hello Everyone... how is it the middle of May already??! Well it's time for some more inspiration for the current Reader's Art Quest at Unruly Paper Arts. This month's challenge theme is "Food Glorious Food" - need I say more. This inspiration board makes me dream of summertime pies topped with loads of meringue.


The Unruly Paper Arts Reader's Art Quest "Food Glorious Food" Inspiration photo and color palette, are perfect for the all sorts of creations and the interesting food holidays are quite fun also.

For this month's inspiration I went back to something I have not done in a while... book altering. This spread I created in an old vintage cookbook for my local round robin group. I really enjoyed this project combining book altering and art journaling.


The page is dedicated to my Dad, his love of cooking and a throw together recipe that my Dad made for me on a visit. Tucked behind the collage clipping of the coffee drinker {from an old baggie of scrapbooking alterables}, I have fashioned a pocket to contain the recipe and the story of his "spaghetti pie." I needed a little something extra to ground my floating pie photo {it was so delicious and no matter how I try, I can't get mine to taste as good}. I got the idea of simpified line drawings from the kitschy images in the cookbook this is created in. The book is "The Fireside Cook Book: A Complete Guide to Fine Cooking for Beginner and Expert" Hardcover – 1949 by James A. Beard. 


I hope you enjoyed my project and that you are inspired to join us in this month's Reader's Art Quest. I would love to see what you create. Please leave me a comment with your link.  :) Sb

Friday, May 8, 2015

Say a SPECIAL Thanks for National Teacher's Day...


Greetings Friends! In a couple weeks school will be ending for summer break and I wanted to make a special gift for the teacher. If you search Pinterest there is a plethora of ideas - it's quite overwhelming. I found loads of fun ideas that I can do with stuff I have on hand that sent me off to the studio to rummage through my scrapbooking stash.


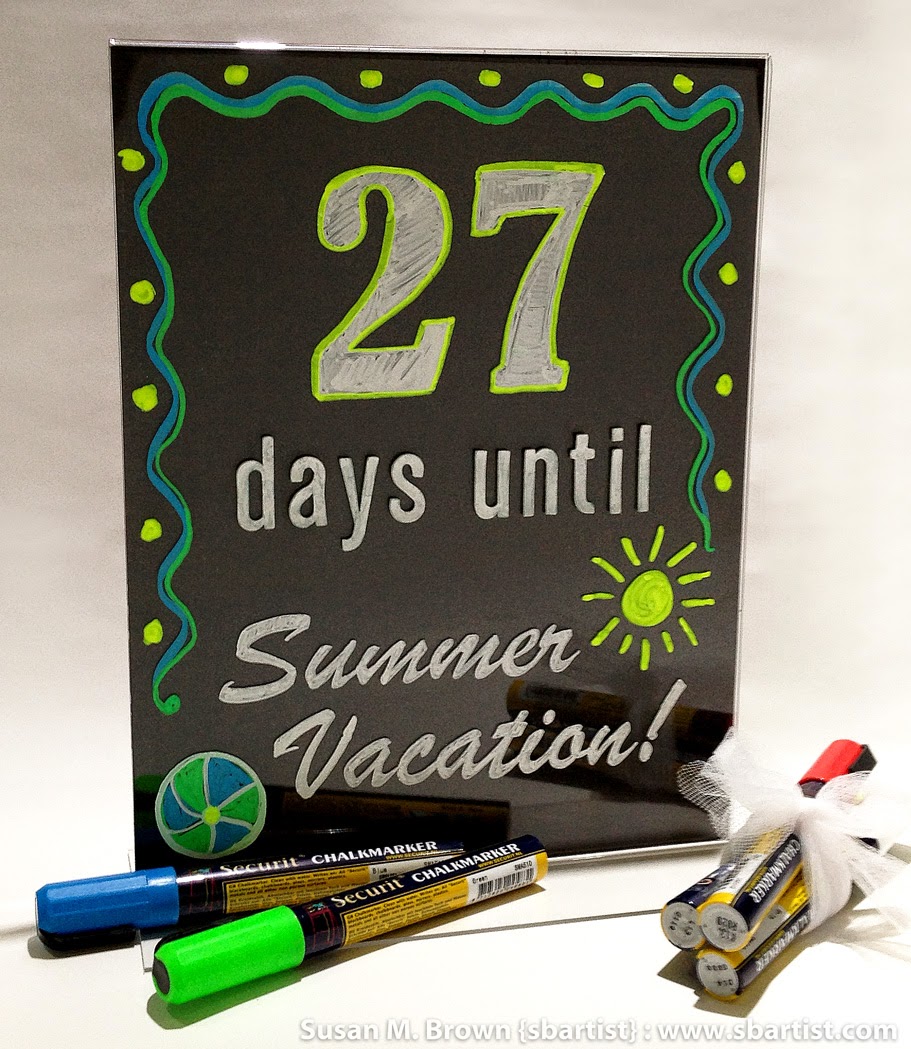
I'm sharing a quick and easy handmade Teacher appreciation gift with items you have in your craft stash, a Deflecto Craft Frame and Wet-Erase Markers. This project can be done in about an hour, the kids can even help, and the best part... it's re-usable and interactive, too!

For more information on the Deflecto line of products,


This month the Deflecto USA Ambassador Design Team is sharing a variety of projects Teacher's as well as for Mom's, Dad's and Grads using Deflecto Craft products so you'll want to CLICK HERE to jump over to the Deflecto Craft Facebook Page or Deflecto on Pinterest to see more of the teams creations.


For this project I used the 8 1/2" x 11" Deflecto Double Sided Portrait Frame Item #879201. A heavy-duty, two-sided clear frame featuring durable acrylic - this holder is tough enough to withstand frequent use... perfect for a busy teacher. It couldn't be easier to fill and decorate. I trimmed a black sheet double-sided scrapbooking paper to size and layered a large heart doily over the top.


My penmanship is not what it used to be so I did a little creative cheating - but it was more for being a SUPER TIME SAVER! I picked some fun fonts and printed out my text on the computer sized to fit the frame. I placed the printout in the frame and traced around the letters and colored them in using the non-smearing, fast-drying Deflecto Wet-Erase Markers. I have to admit this totally looks store bought.

I completed one side and let it dry completely before penning the other side. I recommend working upside-down and from left to right - it seems alien to do it this way, but it keeps your hand out of the wet chalk ink as you work.


The only other craft item I used was some American Crafts "Thickers" letter stickers applied to the outside of the frame to spell out "days until". This adds a little dimension and I used up a little something I had on hand. The stickers can be easily removed later if desired.


The great thing about the Deflecto Wet-Erase Markers is that with a quick wipe with a damp cloth, this can be changed and re-used over and over again. The black paper simulates a blackboard and the frame can be changed out to hold photos, calendar or other signage.


The finishing touch in blue - a personalized message.


With a handmade card and tied up bundle of the Wet-Erase Markers... this gift is ready for teacher. Wouldn't your child's teacher love to receive a thoughtful gift like this?

How would you create with Deflecto Craft Frames?

Thanks for visiting! Please join me each month when the Deflecto USA Ambassador Design Team will has a new Deflecto product challenge to debut.  :) Sb

For more information on the Deflecto line of products,

Monday, May 4, 2015

It's All About the BLING... Designer Crafts Connection May Bloghop


Hello Everyone! It's the first Monday of May which brings another Designer Crafts Connection Bloghop... this month we bring you a BLING-a-palooza! Our creatives are sharing projects that are "All About the BLING" to inspire you with sparkle and shimmery delight.


Bling bling everywhere... in every size, shape and color! In paper, beads, glittery paint and more! Where does one begin to play??! For my project today, I'm doing a little recycling of some empty double sided adhesive spools and transforming them into some fun sparkly bangles. 


First I remove the paper lining from the inside of my cardboard spool {since I wrote all over it to remember what brand/size it was}. Then I give my plastic spools a rub with alcohol to clean off the surface to prepare for coloring.


The one red-line tape spool had a small amount left on it - just enough to cover the surface of both plastic spools with one layer of adhesive. I had one layer of adhesive left on my cardboard tape spool as well. After burnishing down with a bone folder, I'm ready to attach my bling.


I selected a pretty purple color from my Spectrum Noir alcohol markers and colored the edges if both plastic spools - leaving the inside a sheer white as it came.


I also colored the edges and inside of the cardboard spool. 


Now I peel back the adhesive and start to adhere my gems alternating purple and pink. These gems I scored from a visit to the Dollar Tree one day. I can't resist stopping in one on my daily adventures - especially one that's not on my normal route.


On the paper spool I used the larger squares and placed them on point, leaving the adhesive exposed to form a harlequin pattern. After adhering all the gems, I went back with my alcohol ink marker and swiped a layer of color onto the exposed adhesive. 


When dry this area is still slightly tacky, so I dump on some clear embossing powder to seal off the exposed adhesive. I could have dusted with baby powder, but that might have clouded the coloring.


After a quick burst with the heat gun, the adhesive areas have a nice mottled texture and give a nice contrast to the gems. 

These were so fun and easy to make - and in under an hour. This project would be great for the kids {except for the heat embossing step}. The best part - I didn't have to break out any glue and I used up three spools in my tape box. The next time I'm doing resin work I may give them a proper clear coat sealing for extra durability - but they are totally fun, flirty and ready to WEAR!

"Easy Peasy Tape Spool BANGLES"


Thanks so much for visiting! Continue on the Designer Crafts Connection "It's All About the BLING" Bloghop by selecting hop back/forward on the logo below to enjoy all of the wonderful inspiration. Happy Creating! Sb :)