Translate

**If you have previously subscribed to received my posts via feedburner or Bloglovin, those are inactive now. To receive my creative updates, please subscribe in the right sidebar.**
Showing posts with label Under the Sea. Show all posts

Saturday, September 2, 2017

Summer #Cre8time Memories...


Hello friends! As summer comes to a close, one can't help but want to remember days adventuring at the beach. I love to create mini-books that house my photos and mementos from vacations... and I don't have to look far for finding something to create with – but for this keepsake... I've raided my pantry and refrigerator!


A set of vintage by the sea stamps by Rubber Dance Art Stamps are inspiration for the theme of my project which will be housed in a recycled cheese box that was in the refrigerator. I also raided my pantry for some paper boxes to serve as a sturdy base for pages.


I began by gently peeling off the package labeling to give me a blank slate to work with.


I measured a circle to fit inside the box and cut a template to trace out front and back pages from the recycled cookies/cracker boxes and from the corrugated packaging.


Then I distressed the outside of the box and both sides of the pages with an acrylic/gesso mix and also some spray mists – this gives a real white-washed beachy feel.


I also distressed some sheer organza ribbon and white cheesecloth with distress stains and spray mists... using them to mop up all the glittery goodness from the sprayed pages along the way.


I adhered some double-sided sheet adhesive cut to fit the pages and began to assemble my mini book. I sandwiched the ribbon and cheesecloth between the pages – adding some double-sided tape to the top of the ribbon to lock them in place when I adhere the top page.
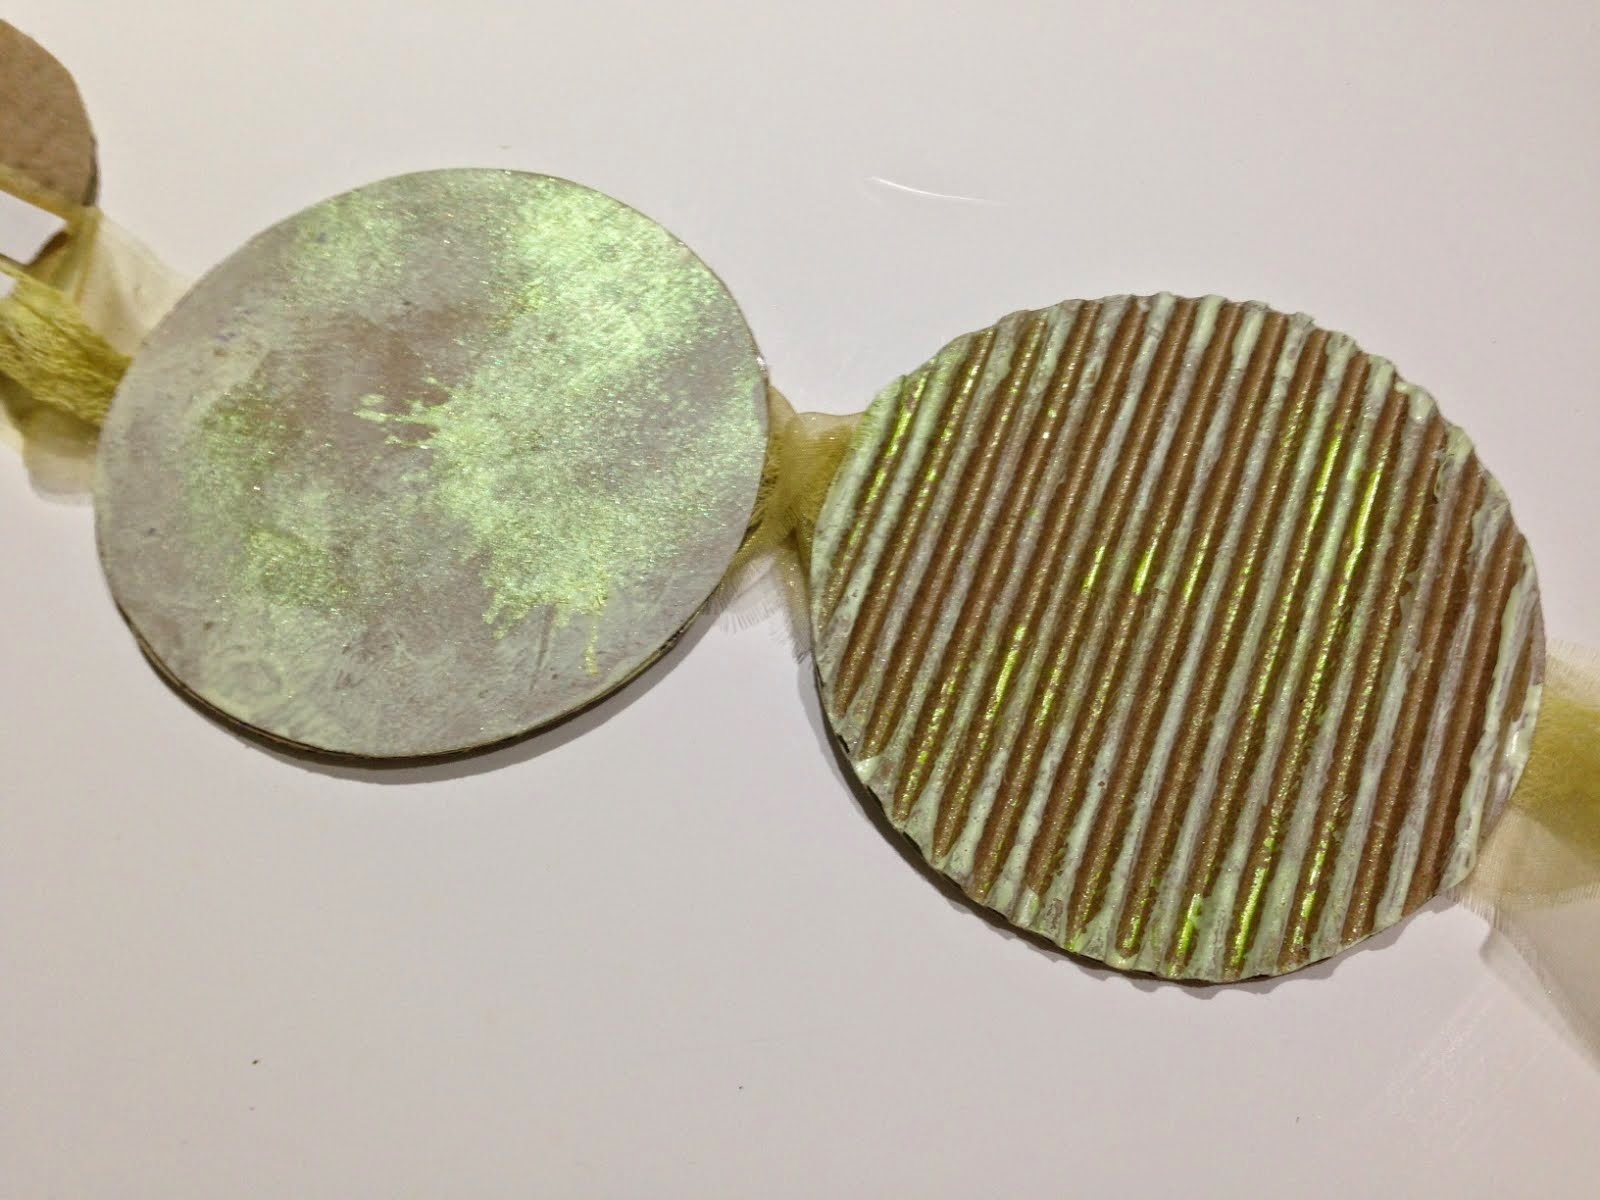


Between the pages, I added some knotted natural green dyed raffia.


I even used a recycled envelope for ephemera... nothing goes to waste! I distressed in the same fashion as the pages and adhered using circle cut double-stick adhesive sheets. I'm normally a glue-stick girl, but after all the painting and distressing, the double-sided adhesive makes assembly quick and easy.


I stamped my images using brown dye ink onto creme cardstock primed with the same acrylic/gesso base as everything else; then tearing each image out and distressing edges with chalk inks to complete the vintage weathered feel.


I layered onto the corrogated pages a section of distressed cheesecloth and one image adhered with tacky glue.


I added some antique gold dewdrop ink to the inside of the box and layered one of the images to the base, and blending the hard edge of the envelope and white box with the corrugated border around the sides... WOW this is so lovely!


Now for some finishing touches! A resin cast sand dollar colored with spray mists and antique gold ink; a recycled dry cleaning tag; section of cheesecloth; raffia stands; and some real mini seashells to complete the scene.


I accordion fold the book into a stack and nestle it nicely into the box. It's all grungy and weathered and looks like it's just washed ashore!

Memories by the Sea...


This cheese box has been transformed completely – one would never guess what it was when I began. Keep a lookout in your pantry, the fridge and your recycling for amazing and interesting things to upcycle into something beautiful and useful! I even have space leftover to add some of my vacation photos from Jamaica last fall.

I hope you have enjoyed my recycled stamped creation – I truly enjoyed making this keepsake. What would you recycle for use as a summertime keepsake?

Thanks for visiting! :) Sb

Friday, October 17, 2014

Decking the Halls with Hebe Cord...


Welcome to another special Designer Crafts Connection Bloghop - introducing you to a NEW product... Hebe Cord by Sullivans USA - manufacturer of innovative sewing and quilting products, floss and specialty threads. Thirteen Designer Crafts Connection Designers accepted the challenge of creating with this new cording. With Christmas coming right around the corner, I knew exactly how to put this product to the test... making tassels for my handmade paper ornaments.


Sullivans USA provided me two gorgeous colors of Hebe Cord - a light powder blue and a gorgeous teal blue. Hebe cord can be used in various ways such as knitting, crocheting, knotting and tatting... or macrame {remember that}!


Hebe Cord is 1.0mm in a 25 yard skein and is available in 31 beautiful colors. With the variety of colors, you can create in your favorite team or school colors and perfect for braided friendship bracelets. 

The Hebe Cord has a fine weave, though is sturdy and satiny. Right away I'm loving that this cord doesn't unravel - which is great for making tassels. I love to make my own tassels for my handmade ornaments. I can customize the color and adjust size to match ornament scale. My main issue... making tassels from embroidery floss is a bit challenging to keep the threads neat and tidy as it does unravel - causing me a lot of frustration in wasted time and supplies to compensate for double backtrimming.


Before beginning winding my tassels, I needed to get the cord secure onto a card to keep it neat and unknotted. I loosely wound it around a flattened toilet paper tube from my paper recycling bin.


I gathered a few supplies: Hebe Cord; 1/8" satin ribbon hanger; beads and bead endcaps; patterned paper folded into ornament; adhesive to secure folded paper shape; scissors, and handmade tassel making template cut from cardboard/chipboard. I'm making a tassel for a larger lantern size ornament made from a 12" sheet of patterned paper. Living in South Florida - Christmas isn't always traditional red and green with Santa and his elves... around here it's a bit tropical. My patterned paper is a lovely glittered seashell pattern {my apologies I can't remember the make and it's not printed on the back}.


I cut a couple short strands of Hebe Cord to use for a hanger for the tassel and another to tie off the strands to make the rounded top. No measuring here - I just eyeball it. I just need the hanging part to be long enough to secure inside the lantern and the tie off to be long enough to blend in with the rest of the fringe when complete. I have knotches cut into my template to hold the cord in place while I'm wrapping.


I take the tie off section {which is approx. 12" long} and wrap around the top edge of my template and secure ends in knotch. Then I secure the fringe edge at the bottom of my template to leave my hand free to wrap cord evenly.


I wrap the cord around the template - not too loose and not too tightly about 25 to 30 times. Again, this is not a measured thing, I just keep wrapping until there seems to be enough strands to make a full tassel.


I gently pull through the tie off section and tie a knot off at the top of the wrapped section. This will form the hanger at the top of the tassel. I insert the second strand through the slit around strands, pull tight and knot to secure forming the poof at the top of the tassel. The template helps hold the strands in place keeping your hands free to tie knots.


With knots securely tightened it's now safe to cut strands at the bottom to remove from template. After removing from template, I pulled individual strands to tighten/adjust the strands at the top in the poof. This is where I find myself fussing about like I'm tying a ribbon bow. 


I took the loose strands of the knot and snugly wrapped around to create a banded area below poof and tucked the loose ends inside the wrapped area. No need for glue and the knot is nicely concealed.


I prepared for final trimming by wrapping a small strip of paper around the strands, taping closed. I slid down to the bottom of the fringe and used edge as guide to backtrim edges flush. You can see in the photo that after all the handling so far {which was a lot of fussing to straighten the poof to my liking}, the Hebe Cord has not frayed one bit. AMAZING!!!


Using sharp scissors, I pinched the ends flat and cut flush at edge of paper wrapping. Tassel is complete and ready for finishing details.


At the top of the tassel I added a silver bead, pulling down over knot - craftily concealing the knot snugly inside.


Completed tassel is simply GORGEOUS!!! 


I'm so thrilled with how my tassel has come out and it looks so rich and luxurious like the fancy expensive tassels you can buy. I look forward to converting all my tassels from embroidery floss to Hebe Cord!


Thanks so much for visiting! Continue on this special Designer Crafts Connection "Hebe Cord Challenge" Bloghop by selecting hop back/forward on the logo below to enjoy more ways to use the NEW Hebe Cord by Sullivans USASb :)

Sunday, September 28, 2014

Sneaking a Little #Cre8time on Holiday...


Hello everyone! As summer comes to a close my hubs and I were able to squeeze in a last minute vacation to the tropics and we had a little ARTchaeological adventure! I couldn't resist packing a little Amazing Mold Putty along with my watershoes, binoculars and camera.

On our last day in paradise we ventured out on a covert "molding" mission. The mission was to capture something wonderful in Amazing Mold Putty that I could bring home and be used for my art creations. There were so many wonderful finds, designs and textures to choose from - making it hard to decide!


We are home now and not only do I have this fabulous mold for use in my art, but I also have a special memory shared with my hubs from our travels. I'm excited to experiment and see what I create with my fabulous new mold.

CLICK HERE to jump over to see
how I captured a piece
of the SEA in time...

Thanks for dropping by. Have a creative day! :) Sb

Friday, August 1, 2014

#Cre8time for making Underwater Reality...
T!m Holtz #12Tags2014 for July


Good morning everyone! July was been a whirlwind and despite my best efforts... my muse commands her Cre8time beauty sleep to recharge. I always plan to play along with the monthly T!m Holtz' 12 Tags of 2014, but sometimes life and other creative projects take precedent. The July tag was summer themed and bits a pieces of this project took me most of the month to MAKE and complete... and I am so thrilled with the results!!!


I am presently on the hunt for a large preserved seahorse to mold/cast in Amazing Crafting Product {that it's beginning to reach obsession status}, and since I don't own the sea life Sizzix dies {and my CuttleBug set is way too small in proportion for this project} I decided to DIY my seahorse. This is a vintage seahorse image from The Graphics Fairy that I printed out on the laser printer and mounted to a recycled piece of chipboard at the end of a notepad {1/4 letter page size}. When the glue stick was fully dry I swiped a few different colors of Ranger Distress Stains to add some color.

**A NOTE of Observation** I printed these images out on the lo-end Dell Laser printer at work... not the big-Elsie Xerox Digital Press and to my surprise - the rubbing of the distress stains dissolved and removed some of the toner. I'm OK with the results as it adds to the DISTRESSED look. Just wanted to point out that little discovery. 


I waited for my stained vintage seahorse to fully dry - then I slathered on the Ranger Rock Candy Crackle glaze and set off on my daily adventures {this stuff takes quite a while to dry}. When dry, I fussy cut using my T!m Holtz Tonic scissors and aged with Ranger Distress inks to bring out the details in the crackle finish. I'm totally loving this look and the subtle details of my original vintage image are still visible.


As you can see in the inspiration tag, the starfish and sand dollar are perfect companions to the seahorse... and mine are resin reincarnations of the real thing. I love using shells in my projects - EXCEPT - they are brittle, fragile and sometimes smelly. Molding and casting them with Amazing Crafting Products is the perfect solution for making a replica that is identical to the real thing.

I also created my own texture stamp and embossing platform for my recycled film {imagesetter acetate} layered in the background. To view how I created the starfish, sand dollar and texture plate please CLICK HERE to jump over to my Mold Rubber Monday feature project. It is truly AMAZING!


This was a lot of work for the end result! I'm so thrilled to paint the papers, make the molds/castings and embossing platform, and hand create all the tiny details for this tag - and this is going to get a proper shadow box home that I will hang on the wall in my studio.

Thanks for stopping by for a visit! August is shaping up to be a busy and exciting month right from the get go. This weekend I have lots of wonderful creations to share and I invite you to join me for my Steampunk Edition of "thoughtful abstractions" at Unruly PaperArts on Sunday.

Have a fabulously creative Friday! :) Sb
