Translate

**If you have previously subscribed to received my posts via feedburner or Bloglovin, those are inactive now. To receive my creative updates, please subscribe in the right sidebar.**
Showing posts with label beach. Show all posts

Wednesday, October 7, 2020

SUMMER is still here... Beach Day REDUX for Creative Fall Crafts


Hello creative friends! Here in South Florida SUMMER is pretty much year round but I still like to change things up a bit for the season. Today I am part of a fabulous gathering of Creative Fall Crafts that has new projects and inspiration each day this week! 


I only know when Fall arrives by the change of decor and advertisements in stores because where I live it's still SUMMER. So I have a quick and easy way to jazz up my door by repurposing every girls' summer go to... FLIP FLOPS! We all have 'em in all sorts of designs and colors to coordinate with every outfit... am I right?! Using a few paper-crafting techniques, I'm going to give my shoes a new season in the sun!

Let me gather a few things: 
Something old... something new... 
something borrowed and something BLUE!


This old (pair of flip flops barely if ever used from the closet); a new metal "welcome" word from dollar store; I'm borrowing some sparkly tulle and wreath decor from the Christmas stash; and some fabulous BLUE distressed raffia twine will be the base of my decor.


For this project you need: ribbons/trim/foiliage picks in chosen colors (for me I'm going with a weathered sea-spray feel); a 1" bristle paintbrush; white craft paint: scissors; a glue gun; embossing powder; clear embossing ink; paper plate; sand paper or sanding block; heat gun; scissors; thin floral wire; wire cutters; quilt pins; recycled pop tops; a peg clothespin (or small dowel rod); and some summertime tunes to help bring back those memories of toes in the sand.


The first thing I do is add some hangers to the back of the flip flops by sliding quilt pins into the foamy soles of the shoe.  Be careful not to poke through the front side. 


I use two pins criss-crossed down into sole to securely affix a recycled pop top. Easy Peasy!


Then I add a white wash quickly to age these a bit by dry brushing a small amount of white acrylic paint onto the wicker. No rhyme or reason - just all over. However it turns out is perfect. Just a small amount of paint transforms the look from glam to seaside shabby chic.


Next let's add a beachy, distressed finish to the metal "Welcome". 
This is quick and easy also - but is a bit messy.


First I rough up the surface with a small sanding block so the embossing adhesive will not bead up and will grab powder nicely.


I place word onto a piece of waxed paper to protect my surface then dab embossing adhesive onto all the letters. 


I gently pick up word and place onto a paper plate then sprinkle embossing powder onto the wet adhesive. Tap away excess into the plate and move across to next section until all letters are covered.


Optional: reapply adhesive to any areas that is missing embossing powder. 


Using heat gun, I activate the embossing powder. Please safety first – use heat safe finger cots or tweezers to hold letters while heat embossing. This powder is a weathered beach patina and has a variegated coloring that instantly transforms the metal. There are a few areas missing the powder, but that is OK. In this case I am leaving as is because it adds to the weathered, beachy feel.


One last thing will tie this together with the shoes. 
I quickly dry brush a bit of white overall and this is done!


It's really hard to capture new finish from far away. 
Here's a close-up of the yummy, distressed texture.


I tie some tulle bows on the straps of the shoes and I'm ready for some final assembly. 


I fashion a hanger by layering the two base raffias and 
wrapping some broom grass around a wooden clothespin.


I put up a hook and hung on the door then added the flip flops with a small pieces of wire and a couple supporting mini sticky back hanger hooks. 


This is my assortment of floral sprigs. This cute seasonal grass broom was taken apart to use at the top of my hanger. I'll have to use the scarecrow for something else. 


I continued to nestle the floral sprigs in and around the straps of the shoes. 


I added a fluffy tulle bow to the top to conceal the hanger.


The last thing was to affix the word welcome with a couple of strategically hidden spots of hot glue.


Honestly, I was not sure how this was going to turn out when I started. This is so beautiful I want to put this outside on my door step. The only reason I don't is because I don't have an overhang and we are in the middle of hurricane season – which brings daily severe thunderstorms. I hope you like it as much as I do.


How you are decorating for fall?


For more inspiration and Creative Fall Crafts ideas,
pop over HERE to see what my creative friends are making. 

This fun redux set me off on a fall decorating frenzy and I'll be back to share a few more projects that I have in the works! Thanks for visiting. Sb :)

Friday, April 13, 2018

Going back in #Cre8time... Remember When Blog Hop


Hello Friends! Remember when we used to scrapbook with Mrs. Grossman stickers, cut photos into fun shapes, used paper punches and Stickled everything?! How about Basic Grey, Rusty Pickle and Daisy D's... I know these were my favorites. What paper or supplies do you still have stashed for a rainy day?

Today I am part of a fun bloghop dreamt up by my creative friend Betz Golden that you don't want to miss. Join me on a fun trip down Cre8time memory lane... featuring projects in which everyone was challenged to use something in our stash that is at least a decade old. EASY PEASY!!


REMEMBER WHEN chipboard shapes and MINI BOOKS were all the rage... and in all sorts of shapes and sizes! I love making mini-books... they are such a great way for me to squeeze in a little scrapbooking while having some fun creating. Today I'm sharing a greencrafted mini-album made from a repurposed pair of flip-flops using some of my old hoarded summer theme scrapbook papers like SandyLion, American Traditional Designs, Paper Adventures, and BoBunny. 


Back in the day, there wasn't a ready made embellishment for everything under the sun like there is now... we used stickers and punches and stamps to make our own. My album cover is stamped and painted with Making Memories and Creative Imaginations Foam Stamps and painted with Making Memories acrylic paints. I had to do a little maintenance on my paints to my surprise most were not completely dried out and I've had them since 2005.


I happily snap photos at every opportunity... so I have loads of vacation photos needing a proper home. The flip flop shape goes great with the travel theme. This pair I used are standard size, and even with the odd shaped pages, there is plenty of room to place photos, add pockets, tags and pull-outs. I've filled this sun-kissed mini album with my favorite pix from my last trip to Jamaica.


I've broken out my stash of EK Success Paper Shaper punches and my Quickutz Dies that were happy to see the light of day -- and combined them with bright and colorful ribbon, buttons, and topped off with Heidi Swapp silk flowers, "original" Prima Flowers and an assortment of tropical colored shaped brads. I even cut apart a sheet of printed vellum with summer phrases to use for journaling.


Remember that Fiskars tool that makes your paper corrogated??! How about that Dymo label maker, or the Xyron 2 and 4 inch adhesive runners {I don't think I can get refills for these anymore}.


I added dimension/texture on an accordion pull-out nestled amongst punched flowers and Quickutz die-cut embellishments. I love making my own embellishments with my punches and die-cuts -- using up all my leftover scraps and off-cuts. Everything is color coordinated and there's no leftovers to add to my never-ending scrap bin. 

What old goodies in your crafty stash will you use to capture your memories?


I have some blog candy to be won... an assortment of Making Memories "poolside" Jigsaw Alphabets - upper, lower and numbers that brand new in packaging from 2004. I found them stashed in the back of a drawer. To be entered in the drawing, please comment below what is your favorite "OLDER than 10 years" craft supply is and when you last used it?

For more blasts from the past inspiration, please visit the links below to continue on the hop. Please be sure to stop at each post and leave some blog love as there is blog candy to be won!


Thanks for visiting! I hope you are inspired to grab something buried in your crafty stash and make something fun ;)  Sb

Thursday, January 11, 2018

#Cre8time takes Flight...

Hello friends... Happy NEW YEAR! Today I resharing one of my favorite and most popular makes from last year.


As my health has made itself my main priority, this has left me with a fraction of the time I used to devote to creating with abandon. Now when my muse comes out to play when she is fully rested and rejuvenated... I have found myself creating things with wings and making some fun stuff to accent my studio.


I've had this papier-maché torso lying around for more years than I'd care to admit - I used to have three and I passed two on to friends. I have to admit I was a bit unsure of what to create with this last one since I've had it so long. The possibilities are endless... so I decided to create an altered torso.

I've painted her up with spray paints and StencilGirl stencils and gave her some handmade resin tropical flair and WINGS!


I created several molds using Amazing Mold Putty: an Art Deco style vintage mirror, a hand-carved polymer clay palm leaf, and some interesting shaped shells. 


The first thing I did is put a border of clear packing tape around the edges of each stencil, on the front and backside, and burnishing with a bone folder. I remember hearing this trick from another artist and thought it was worth a try -- works for me!


First I added some color to the wood accents on the torso. I used Carbon Gray Varathane Wood Stain - it's easy to apply and dries quick. I never heard of gray wood stain... I happen to love this color and the color it achieved. I have an unfinished wood cabinet that is soon to be tackled with this lovely colored stain.


When this is dry I use some plastic wrap to cover the wooden parts to protect area from spray painting with stencils! I used a coating of Mod Podge Matte finish to seal the papier maché torso in preparation to accept a good layering of spray paint.


I have a bright gloss green and a bright blue which I sprayed alternating in no particular pattern.


After I had a nice base layer, I continued adding color spraying through the stencils. The shapes are organic and look like shadows peeking through palm branches at night.


While the paint is drying, I get on with casting my accent pieces. I brush the inside of each mold with Ocean Blue Alumidust and also mix some into a batch of Amazing Casting Resin. This resin turns an opaque white when cured and with the Alumidust mixed in, it will result in a pretty pale blue.


I always make sure to have extra molds on hand to pour any leftover resin so it doesn't go to waste. This is all of the molds poured with resin cured. I needed two of the mirrors so all the small bits are extras for the rainy-day project bin.


Look at the AMAZING detail in the front and back of each shell cast in resin. The overpour {flashing} tears away pretty easy while resin is still soft and any remaining can easily be trimmed away. I sanded edges with an emory board.


I gave a little shine and brightness to the resin pieces by brushing the high points with Tonic Nuvo Embellishment Mousse. This color is a nice pearly pale blue... perfect for beachy themed projects! 


I finished off by adding a section of recycled jewels around the neck to dangle the resin palm leaf and a faceted gem. I crossed the mirror shapes and wrapped with wire to form wings and secured with wrapping wire around the torso. I brushed a little of the spray paint onto the wire to blend it in to the background pattern. I'm so happy with how this looks that I left off the other two shell pieces I prepared {they won't go to waste -- stay tuned}! I hope you love my tropical winged torso as much as I do. She make's a beautiful beachy addition to my creative workspace.


This lady is making a trip to Phoenix, AZ to be on display in the Alumilite Corp./Amazing Casting Products Booth #2214 during Creativation January 20-22, 2018. I'll be demoing all three days, so if you are attending -- drop by and say "HI"!


+++++++

Thanks for dropping by and I'd love to hear what you're favorite make from 2017 is... leave a comment with a link!   xo Sb

Saturday, September 2, 2017

Summer #Cre8time Memories...


Hello friends! As summer comes to a close, one can't help but want to remember days adventuring at the beach. I love to create mini-books that house my photos and mementos from vacations... and I don't have to look far for finding something to create with – but for this keepsake... I've raided my pantry and refrigerator!


A set of vintage by the sea stamps by Rubber Dance Art Stamps are inspiration for the theme of my project which will be housed in a recycled cheese box that was in the refrigerator. I also raided my pantry for some paper boxes to serve as a sturdy base for pages.


I began by gently peeling off the package labeling to give me a blank slate to work with.


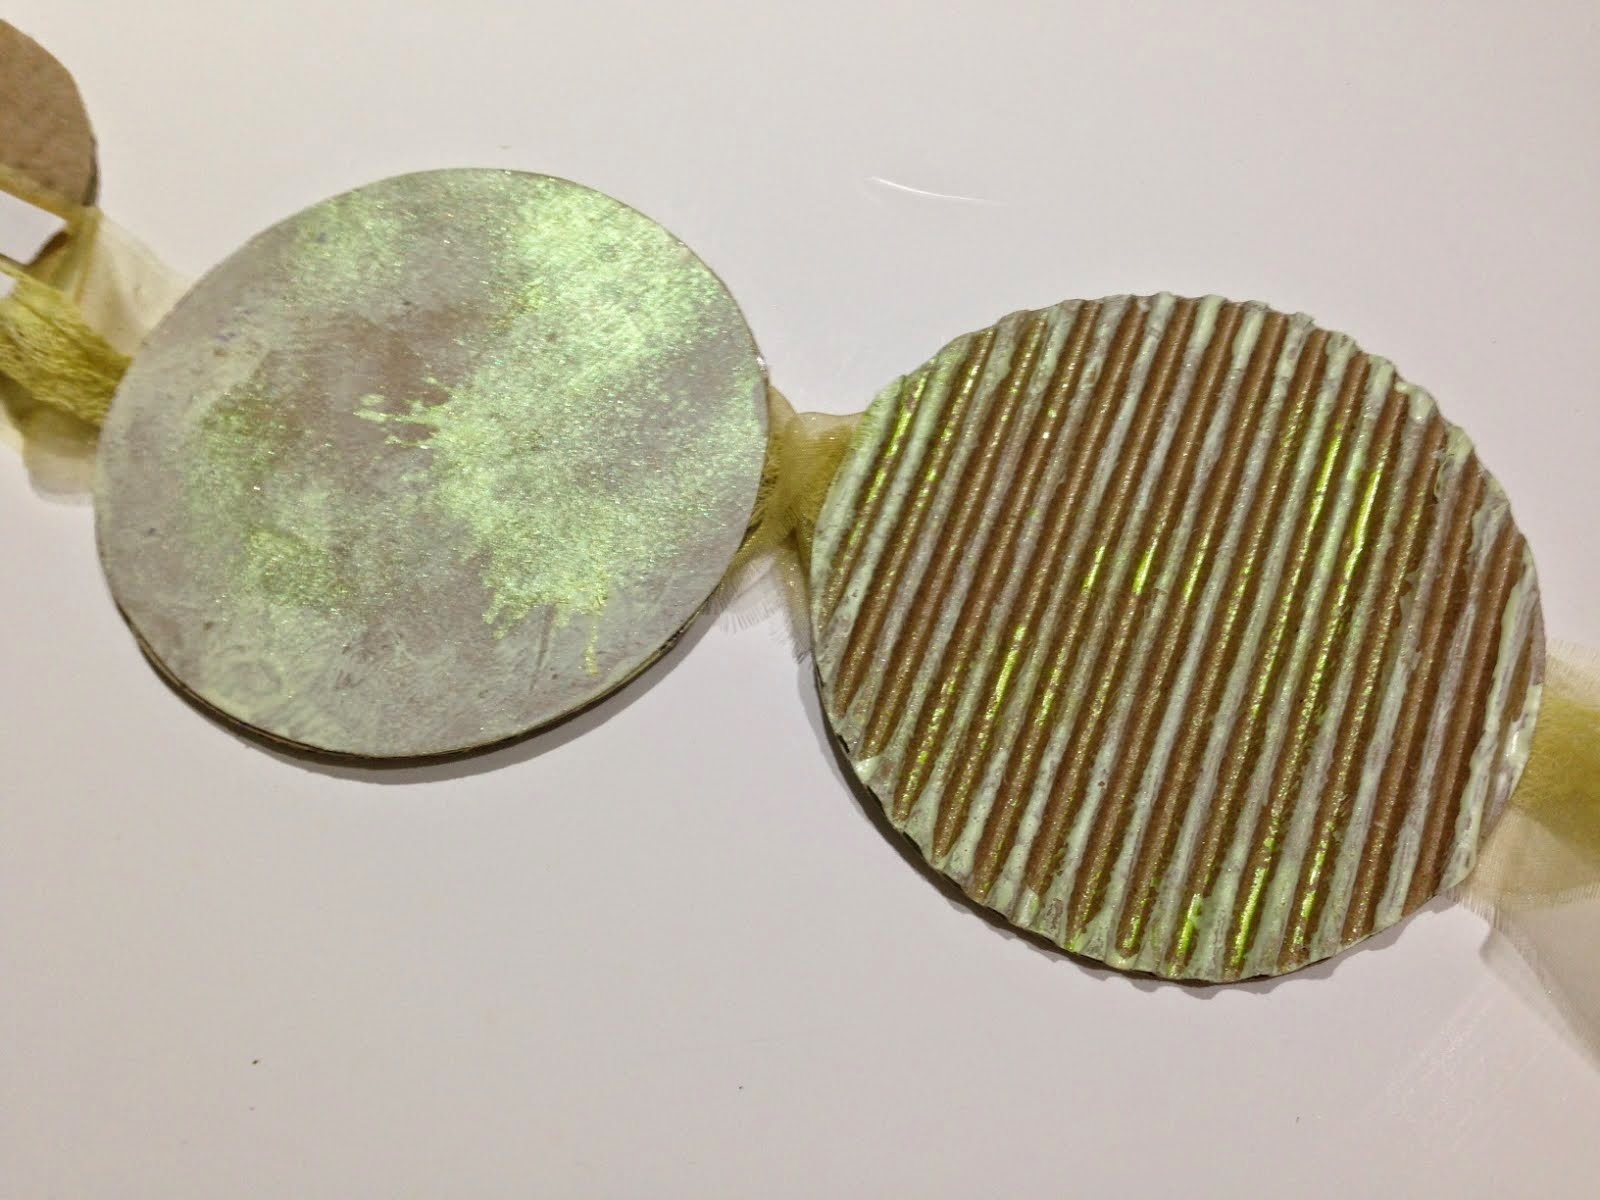
I measured a circle to fit inside the box and cut a template to trace out front and back pages from the recycled cookies/cracker boxes and from the corrugated packaging.


Then I distressed the outside of the box and both sides of the pages with an acrylic/gesso mix and also some spray mists – this gives a real white-washed beachy feel.


I also distressed some sheer organza ribbon and white cheesecloth with distress stains and spray mists... using them to mop up all the glittery goodness from the sprayed pages along the way.


I adhered some double-sided sheet adhesive cut to fit the pages and began to assemble my mini book. I sandwiched the ribbon and cheesecloth between the pages – adding some double-sided tape to the top of the ribbon to lock them in place when I adhere the top page.


Between the pages, I added some knotted natural green dyed raffia.


I even used a recycled envelope for ephemera... nothing goes to waste! I distressed in the same fashion as the pages and adhered using circle cut double-stick adhesive sheets. I'm normally a glue-stick girl, but after all the painting and distressing, the double-sided adhesive makes assembly quick and easy.


I stamped my images using brown dye ink onto creme cardstock primed with the same acrylic/gesso base as everything else; then tearing each image out and distressing edges with chalk inks to complete the vintage weathered feel.


I layered onto the corrogated pages a section of distressed cheesecloth and one image adhered with tacky glue.


I added some antique gold dewdrop ink to the inside of the box and layered one of the images to the base, and blending the hard edge of the envelope and white box with the corrugated border around the sides... WOW this is so lovely!


Now for some finishing touches! A resin cast sand dollar colored with spray mists and antique gold ink; a recycled dry cleaning tag; section of cheesecloth; raffia stands; and some real mini seashells to complete the scene.


I accordion fold the book into a stack and nestle it nicely into the box. It's all grungy and weathered and looks like it's just washed ashore!

Memories by the Sea...


This cheese box has been transformed completely – one would never guess what it was when I began. Keep a lookout in your pantry, the fridge and your recycling for amazing and interesting things to upcycle into something beautiful and useful! I even have space leftover to add some of my vacation photos from Jamaica last fall.

I hope you have enjoyed my recycled stamped creation – I truly enjoyed making this keepsake. What would you recycle for use as a summertime keepsake?

Thanks for visiting! :) Sb