Translate

**If you have previously subscribed to received my posts via feedburner or Bloglovin, those are inactive now. To receive my creative updates, please subscribe in the right sidebar.**
Showing posts with label repurposing. Show all posts

Sunday, December 18, 2016

Getting #Cre8time Girly... Last Minute Gift Idea Bloghop


Hello friends! Are you still crossing off all the names on your holiday gift list... you are in luck today. Welcome to the LAST MINUTE GIFT IDEAS Bloghop hosted by Einat Kessler. Hop along and get Cre8time ready to finish off your list with some ideas for fabulous handmade gifts. At the bottom of the post there is info on how you can link enter a grand prize of a $100 gift card - YAY!!!


I have many girls in my family, two sisters, four nieces, and I'm always on the hunt for fun handmade gifts I can give. I've recently been introduced to Etchall® Etching Créme!... and I am totally hooked! 

Today I'm sharing a quick and easy GIRLY project with you - one that holds a special place in my little GREENcrafting heart, too!

Supplies needed:
  • Etchall® Glass Etching BEE-Ginner Kit
  • removable stencil letters {or traditional letter stencils}
  • permanent marker
  • adhesive vinyl {I used Cricut vinyl}
  • contact paper
  • glass compact
  • xacto knife or swivel knife
  • rubbing alcohol
  • soft towel
  • scissors
  • plastic fork or craft stick
  • timer


If you are like me, you probably are picking up little gifties as you find them throughout the year. I happened upon these fabulous mirrored compacts at Michael's and bought about a dozen of them for a couple bucks a piece. What I really love about them is that they have a beautiful jeweled bezel top on them. A great base to add a custom handmade touch... enter Etchall® Etching Créme!!!


If you aren't familiar with this product - Etchall® is a REUSABLE, easy to use etching créme that creates permanent etched designs on large or small areas of glass, mirror, ceramic, porcelain, marble and slate. No curing, drying required... it just takes 15 minutes! CLICK HERE to read more about this fantastic product. I don't know how I've went on this long never having etched. I have a whole box of glass items I've collected from around the house that I want to etch designs into for home decor and gift-giving throughout the year.

The preparation is the most time consuming part, but since I'm doing a several at once - the process goes quick and easy... and it's FUN! 


This is a fun and easy project that can be done in under an hour. After opening compact from packaging and removing protective film, I cleaned off the bezel surface with rubbing alcohol and dried completely with a soft cloth. Then I cut a small square of Cricut Vinyl to fit over center of compact.


Using pick tool from Etchall® Glass Etching BEE-ginner Kit, I peeled backing from vinyl square and centered onto compact, and burnished down with squeegee tool {also included in kit}- pressing out any air bubbles from center outward. I selected a letter for a monogram and pressed onto the vinyl. I traced the letter onto vinyl with permanent marker, removed stencil and connected lines to fill in gaps. 


Now I'm ready for the hardest part... the cutting! I can cut fine freehand with an Xacto knife, but if you have one of these swivel knives in your studio stash - this is the kind of project that the swivel tool is made for. The swivel blade makes cutting curves so easy. 

I placed my compact on a paper towel to steady it, then as I started to cut, I rotate the compact - NOT THE KNIFE - as I follow the blade along the outline. I find it easier to cut towards myself as apposed to away. 

**A TIP** I recommend doing a test run with contact paper to get a feel for how you are most comfortable cutting vinyl before your finished project. Also to make sure you applied enough pressure to cut through material {it doesn't take much - but it's definitely different than cutting paper}.


After all lines are cut, I used the pick tool to gently pick up the letter and remove to expose the letter shape for etching. I go back and re-burnish to make sure all cut edges are sealed down.

**ANOTHER TIP** I did a dry run of this using contact paper in place of vinyl first. Though it did work, the edge of the edging was not as crisp and sharp as when done using the vinyl. I think it's because the tackiness of the contact paper allowed a bit of etching créme bleed under the edge. The result was fine - but I wanted to see for myself if there really was a difference in vinyl -vs- contact paper... the answer is YES. It's worth it to invest in the vinyl for crisp, sharp edges. 


Before adding etching creme, I add sections of contact paper around vinyl square to fully cover - adding plenty of overlap - to protect from any etching creme drips. It's pretty thick like pudding, but one can never be too careful when making a special gift.


Using the back end of a plastic fork, I placed an even layer of Etchall® Etching Creme to the exposed letter and set my timer for 15 minutes. The leftover creme on applicator goes back in the bottle. This little bottle of créme can be used over and over for loads of projects!!


With the etching créme evenly applied, I set the timer for 15 minutes and wait for the magic to happen.


TIMES UP!!!


With the back of my applicator, I gently scrape away the etching créme and it goes back into the bottle for reuse later. Now the IMPORTANT PART... LEAVE the VINYL and protective contact paper in place and completely wash away any remaining etching créme with water. You don't want to accidentally get any etching smears or fingerprints on the rest of the piece. Rinse under water and rub surface with your finger to ensure all is removed, then dry with paper towel. 


Now it's time for the REVEAL!! Gently peel back the contact paper and the vinyl letter stencil so you can reuse again {I place mine on a sheet of salvaged sticker backing sheet}. I love how the monogrammed letter has added dimension since this bezel is not only glass... it's also mirrored. 


This gift is done and ready for giving paired with a couple other girly gifts - a lip gloss and some bling! The compact was pretty enough by itself... but with the addition of a custom monogram - it's now so much more special and looks so expensive. I can't believe I did it myself. Even my husband was impressed!

Ready for some more last minute gift ideas??! Please hop along at each of the links below and be sure to take a moment to leave each artist a comment and some blog-love.


You can enter to win some amazing holiday blog candy... a $100 Visa Gift Card! Please enter following the Rafflecopter instructions below. *The winner of the $100 Visa gift card will be announced on einatkessler.com on Sunday, Dec 25th. Good LUCK!!!

+++++++

Thanks for dropping by and I'd love to hear what your favorite last minute gift ideas are. Wishing you all a Happy Holidays and I'm off to Chicago for hopefully a white Christmas! xo Sb

** This is a sponsored post. Etchall® has provided products for use in this project in exchange for my creative ideas, views and opinions. My ideas and opinions are my own.

Friday, March 25, 2016

Making a #Cre8time Plan... #Upcycled Ledger Redux


Hello friends! I'm back with another project... that I planned on!! LOL! Yes indeed I'm on my way to becoming a planner nerd now. I'm starting with getting my planner together and I'm so thrilled to be able to share this with you.


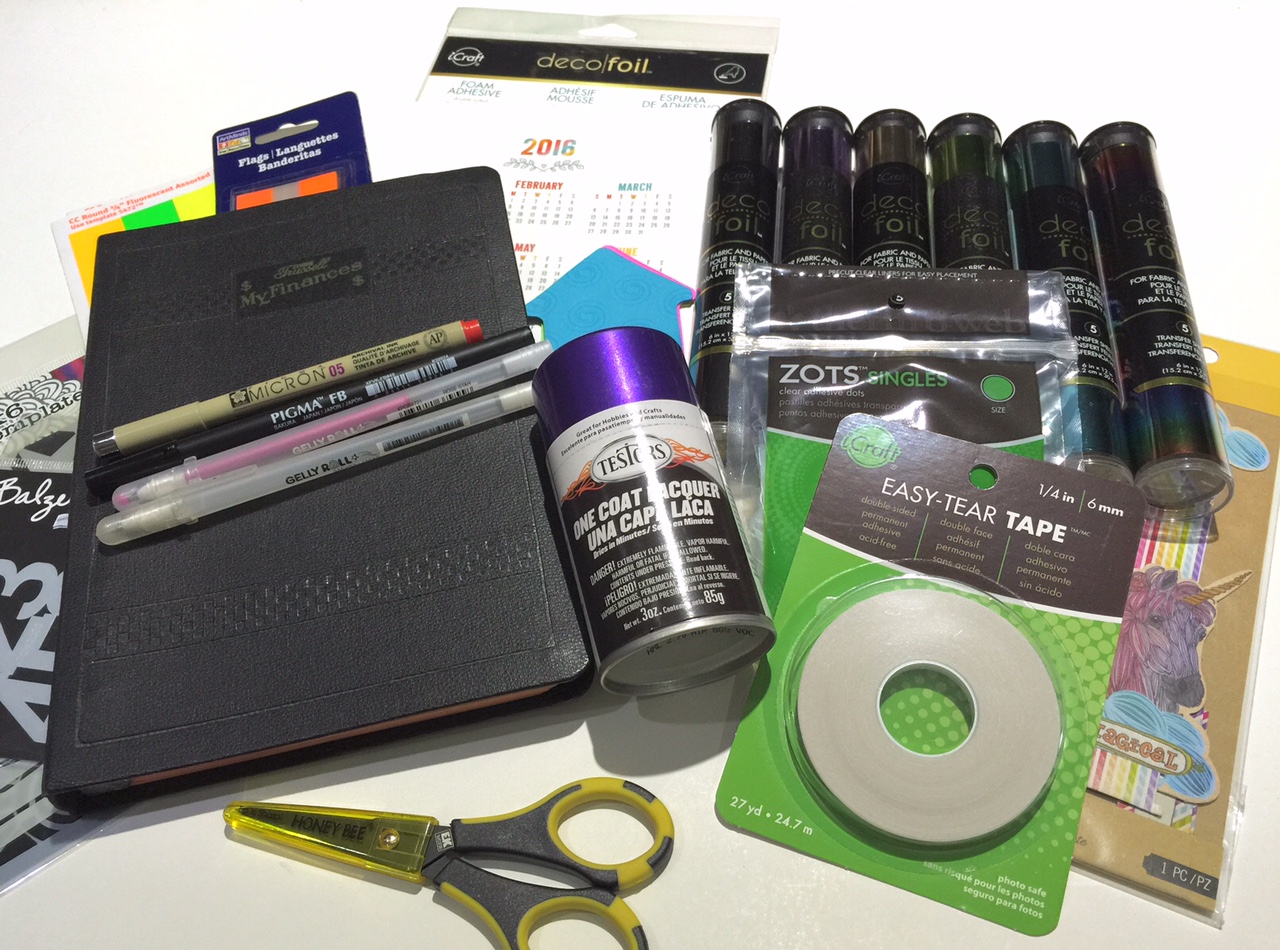
Follow along as I share how I upcycled a Vintage Ledger into an amazing Purple-liscious Planner. Several of the supplies I've used in this project were provided from Sakura of AmericaTestors and Therm•o•web as part of the the Favecrafts Best Blogger Craft Event.


I have been wanting to start using a planner for some time, though I haven't really found one that spoke to me. I always buy one of those day-to-day calendars and they go unused. This year I decided no more and I would make an official planner.

While volunteering at my local artist salvage center, Trash to Treasure, I came across a vintage ledger - complete with a six ring mini-binder, unused grid pages and tabbed dividers. A match made in creative heaven! This ledger has been recycled into an amazing purple-iscious planner with some supplies from my craft stash, Testors One Coat Lacquer and iCraft Deco-Foil.


I gathered all my tools and supplies. Remove contents of ledger and mask off inside with a sheet of tissue leaving pocket exposed. Imagine my luck... I was sent my favorite color {thanks Testors}!!! Now if I could just get my MINI Cooper this same color – just putting it out there to the universe.


Mask off edges of stencil to protect exposed binder pocket and spray checkered border with the Purple-licious Testors One Coat Lacquer. Remove stencil and let dry. Flip ledger cover over and completely spray Purple-licious. Set aside to dry. My apologies I don't have pix of the spray painting... I did this outside quickly as it was getting dark.

Suprisingly with the heat and high humidity, this paint dried much quicker than I expected. Most was dry to touch in about 10-15 minutes – but I left it to dry for about an hour while I went ahead and worked on the contents of my planner.


Alter tabbed dividers by cutting strips of iCraft Easy Cut Adhesive sheets to width of tabs. Trim to size and apply over tab, folding around to backside. Burnish down with bone folder.


Using mini guillotine cutter, cut strip of iCraft Rainbow Deco-Foil about 1/4" wider than tabs. Remove adhesive backing on tab and align Deco-Foil strip with edge of tab and wrap around backside, completely covering exposed adhesive. The tabs are blingy and totally transformed. Each tab continues with the next color of the rainbow and just makes one happy.


Gently burnish and peel away foil backing. Repeat process with remaining tabs continuing with same strip of Deco-Foil (required two strips of foil to complete all tabs). Cut section of iCraft Easy Cut Adhesive to size of title block on ledger cover. Remove backing and apply, burnish down then apply Rainbow Deco-Foil.


I used two strips of the Rainbow Deco-Foil... nothing goes to waste! No heat, no wet adhesive, and super quick – so EASY PEASY!! I have 5 other colors and I can't wait to use them on more projects.


I added fun pockets with mini bags folded over, edges adhered and mounted to dividers using iCraft Easy Tear Tape. Now I'm ready to put everything back together. Even my post-it stencil masks have made it into my planner!


I cut my downloadable planner pages to size and punched holes for this six ring binder configuration. This binder is about 1/2" so it may only fit two months at a time for day-to-day pages. I'm OK with that. I replaced all the pages into binder, adding ephemera, clips, stickers and other planner goodies. I have loads more, but I'm just a newbie here. I will share more as I work along.

From Vintage Ledger to
Purple-liscious Planner...


The transformation is complete and it's time to plan more crafty goodness! I plan to use my Sakura of America Pens to doodle and color the inside of the cover. I LOVE how the cover is transformed from the blah black to this amazing purple-licious!!!


Supplies Used:

This is an easy project - though consideration should be taken for use of spray paint and have time allotted for drying. Project can be completed in an evening and will continue to evolve over time as entries and journaling added. I know I'm going to have fun with my NEW "old" planner.

Thanks so much for visiting! I hope you drop by and check out all the Favecrafts Best Blogger Craft entries when the voting begins on March 31st. Happy Creating :) Sb

Sunday, July 13, 2014

REPURPOSING with Natural Beauty... Designer Crafts Connection Burlap Fabric Bloghop


Welcome to a special Designer Crafts Connection Bloghop dedicated to all things Burlap. I'm very excited to have an opportunity to create using the wonderful products from BurlapFabric.com. I have so many projects in the works - some being "REPURPOSED". I'm beautifying items for functionality and organization in my studio {a room that is currently getting a much needed overhaul}.


Join us July 13th through 20th for this blog hop promoting Burlap Fabric. Burlap is so popular in crafts and decorating and we will be sharing some wonderful ideas and projects using it... there will also be a giveaway too {scroll down for Rafflecopter entry info}.


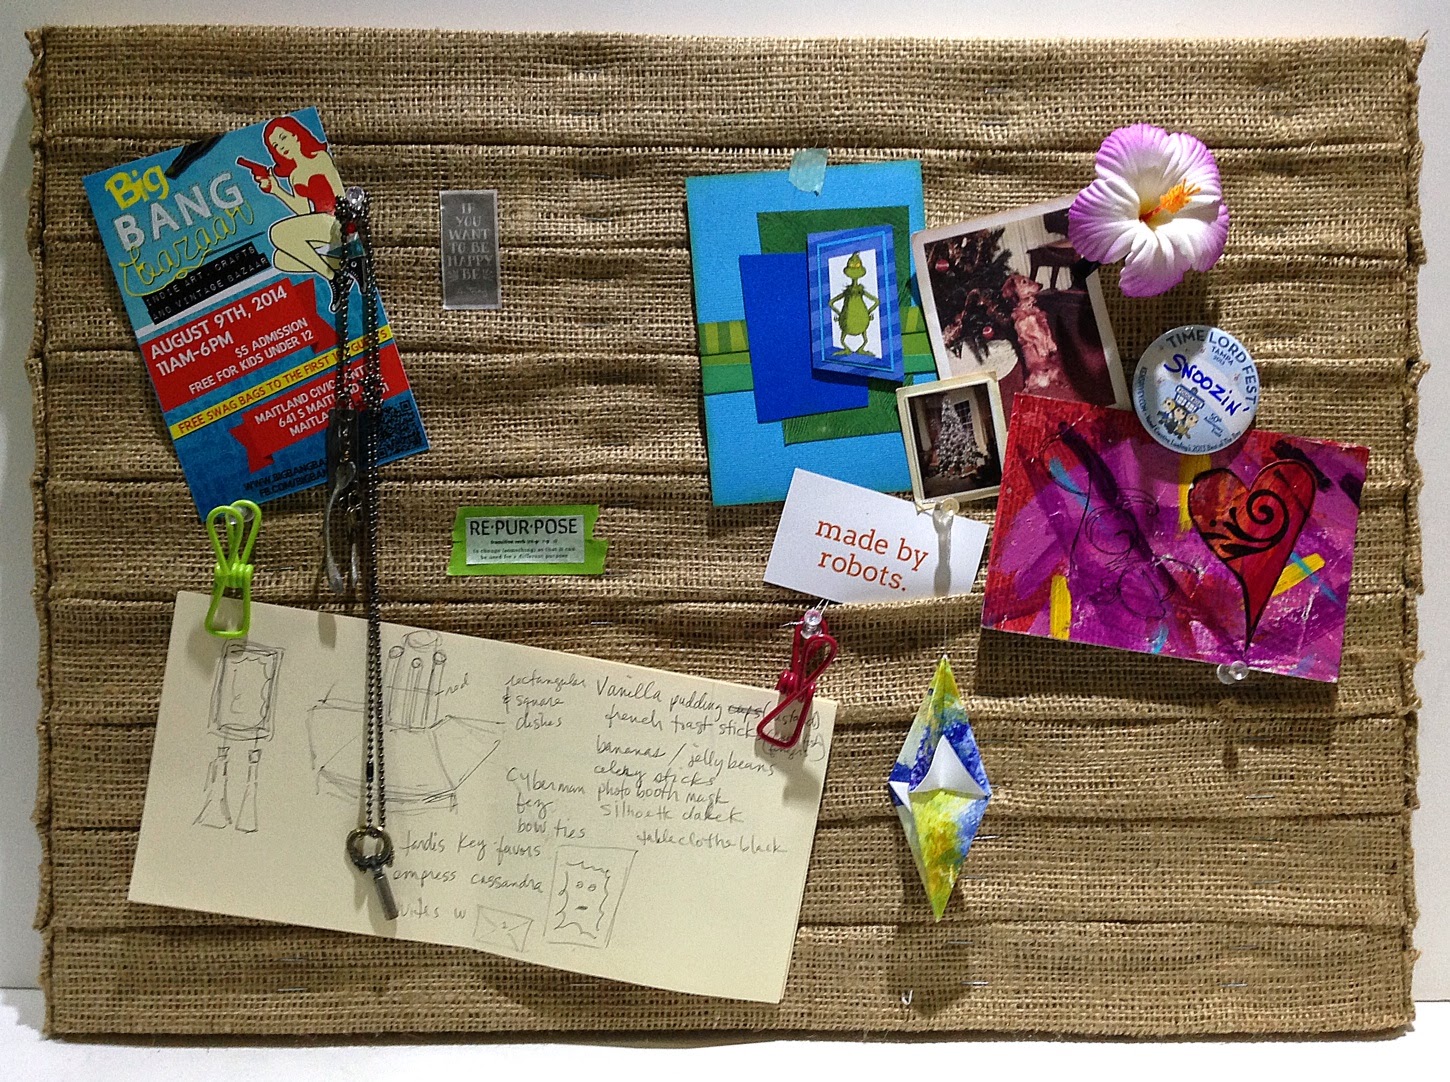
For my project today, I have altered this generic dry erase board that lives under my craft table... mainly out of sight and out of mind. It would be really nice if it could serve as a dual purpose - the backside being a bulletin board.


When I received the generous assortment of burlap fabrics from BurlapFabric.com for this event... I was thrilled to have received a purple check burlap trim and also some 14" wide burlap fabric!! I knew exactly what to do. Make another faux palette piece for my studio. I have a couple fun projects in the works with the yards of red burlap fabric too.


First thing I needed to cut a piece of foam core to mount into the backside of the frame to use as a bulletin board. Since I will be mounting the strips of burlap horizontally like a wooden palette would be, I will be able to use pushpins as well as clips.


Using some 3M Spray Adhesive, I mounted the foam core to the backside of the dry erase board. This just happened to fit the depth perfectly - aligning flush with the edge of the frame. Now I'm ready to alter this in a similar fashion to a 24" x 36" inspiration quote board I made a while back for my studio and was a huge project, because I created the whole thing from scratch {CLICK HERE to view}.


Before I started mounting the burlap strips, I wanted to give a wash of color to the stark white foam core so that I wouldn't notice it through the weave of the burlap fabric.


Using Vintage Photo Ranger Distress Stain, I swiped the dauber to apply color over the entire sheet of foam core. I'm not concerned at how it looks, I just don't want any white showing through the burlap. This did the trick and the large burlap fabric made this project easy to complete in under two hours {including the primping for photos}.


The burlap fabric I'm using is 14" wide by 10 yards. I can make several of these if I want! I cut three sections the length of the board with approximately 3" overhang on each side. Then I cut each of these sections into thirds lengthwise. 


To help keep the strips folded in thirds, I applied strips of masking tape. Final step is the stapling. I started along one edge, then on the opposite edge - alternating and working towards the center; adjusting the widths as I filled in.

I laid one strip across the board and wrapped the overhang around the side, setting with a staple gun loaded with 1/2" staples. I folded over the excess and stapled in place giving the faux wood board look {as in photo above}. I flipped over to the opposite edge, pulling the burlap strip taught, and repeated the stapling. To cover this board I used nine strips that are approximately 2 1/4" high. Using a regular stapler, I set some staples across the length which disappear into the burlap texture to help prevent sagging over time. I may go back and add some fabric glue to tack it down permanently later on.

Now for the FUN PART... adding all the stuff that's cluttering my desktop that needs to be properly displayed!


My dry erase board now has a dual function which matches my studio inspiration quote board which is a larger faux palette piece... and will certainly be utilized instead of being stashed under the desk.

+ + + + + + + + + + + +

Don't forget to enter to win the fabulous prize package from BurlapFabric.com valued at $100 that includes a really nice variety of natural and colored burlap yardage, ribbons, embellishments and totes.

http://burlapfabric.com/
http://www.pinterest.com/burlapfabric/
https://www.facebook.com/burlapfabric
https://plus.google.com/+BurlapFabric/about
http://instagram.com/burlapfabric
https://twitter.com/BurlapFabric
https://www.youtube.com/user/BurlapFabric

a Rafflecopter giveaway

+ + + + + + + + + + + +

Thanks for visiting. Continue on the Designer Crafts Connection "BURLAP" Bloghop by selecting hop back/forward on the logo below. The next stop on the hop is "Life in the Craft Lane™" with Julie McGuffie. Enjoy all the wonderful Burlap inspiration! Sb :)


Lisa Fulmer - lisalizalou.com
Marilyn Gossett - marilyngossett.blogspot.com
Sue Eldred - sueeldred.com
Susan M. Brown - sbartist.com (you are here!)
Carmen Flores Tanis - florestanisstudio.com
Cherish Flieder - somethingtocherish.com
Jennifer Priest - hydrangeahippo.com