Translate

**If you have previously subscribed to received my posts via feedburner or Bloglovin, those are inactive now. To receive my creative updates, please subscribe in the right sidebar.**
Showing posts with label hand lettering. Show all posts

Saturday, August 24, 2019

Our Favorites Mixed Media YouTube Hop - #ArtJournaling Edition


Hello friends! Where has summer gone?! I have just returned from a getaway with my hubs and I am part of an artful adventure... and all are invited to join me! 


It's been awhile and I'm so excited that I am participating in another YouTube hop -- "Our Favorites Mixed Media YouTube Hop - Art Journaling Edition", featuring twenty-two artists from around the world! If you missed my first adventure via YouTube CLICK HERE.


For the "Our Favorites Mixed Media YouTube Hop – Art Journaling Edition" I create an art journal page inspired by a quote from David Tennant of Doctor Who. This page is full of color, texture and timey-wimey techniques - I hope you enjoy! 


This hop would not be complete without prizes from our fabulous sponsors! See below for hop list and prize details! Don't wait to get hopping... The Our Favorites YouTube Hop Giveaway will have winners drawn on August 26th and announced on August 31st. Each video's description box will contain the list of artists and a link to your next stop... sit back, grab a snack and enjoy the Hop as you watch the videos! 

🔹️🔹️ To enter to win one of our amazing prizes you must  🔹️🔹️ 
1 - subscribe to each YouTube Channel 
2 -  like and leave a comment on each video (note: some have location restrictions for shipping, so please leave your country in your comments).

Spend the weekend on a creative binge and enter to win -- just view, subscribe, LIKE and comment on the each of the videos as you hop along!

 ** HOP LIST **
Laura Dame - Laura Mixed Media: https://youtu.be/QWyYaIl7rS8 
Susan M. Brown {sbartist}: https://youtu.be/ZG9MO5f5CR4 
Heather at the Kraaft Shaak: https://youtu.be/EJkjA5bfdXQ 
Aleksandra Mihelič: https://youtu.be/s2NTOmpO9IY 
Susana Magenheimer aka Randomartist222: https://youtu.be/X5MptcmXxds 
Ilse Kleijer - IKmetliefde: https://youtu.be/qTY2hkDfMZs 
Melina Dahl - Minas kreativa: https://youtu.be/705vm6hbZAM 
Danielle Mack at A Painted Page: https://youtu.be/0iVyqK9g-iA 
Kristin Van Valkenburgh: https://youtu.be/h0anDeLe7Tg 
Alexa Doebler - Blue Woods Design: https://youtu.be/eAIPmKyopjQ 
Erin DeCoste - Happily We Go:https://youtu.be/9GilUrW1sxI 
Michelle Liptak-Mickelnay: https://youtu.be/ILRe3cVp7Q0 
Connie Shaw - Sparksgirl Mixed Media: https://youtu.be/--KKbtZp6xY 
Studio Marielle Stolp: https://youtu.be/UbVV7aZmW0c 

** Our Favorites YouTube Hop Sponsors and Prizes ** 
 Blue Woods Design/That's Crafty UK - 2 sets of stamps designed by Blue Woods Design for That's Crafty UK 
 Joggles- 1 $25 gift certificate Grafix - 1 pack of clear and 1 pack of matte computer Grafix paper 
 Retro Cafe Art - $75 gift certificate 
 Susana Magenheimer - prize package ($25 value) 
 TCW - Stencil gift pack of (10) 6x6 NEW stencils retails for $60. 
 Pronty Crafts - A set of foam stamps and stencils by Dutch artist Julia Woning 
 Rubber Dance Stamps - €25 Grabbag of Stamps 
 Shawn Petite - 5 stencils of winners choice ($50 value) 
 Marabu Creative - prize pack 
 Michelle Liptak-Mickelnay - journal DecoArt - 2 prize packs 
 Kristin Van Valkenburgh - prize package 
 Kraaft Shaak - Mixed Media creation bundle - US only 
 Gelli Arts - $50 gift certificate 
 Nicole Watson - prize pack 
 Ilse Kleijer - prize pack (includes 2 AB studio stamps) 
 AB Studio - 3 stencil pack designed by Nuneka 
 Little Birdie - $25 gift voucher + shipping 
 TandiArt - DIY Fairy Art Kit 
 Susan M. Brown {sbartist} - prize package 
 ArtFoamies - 2 VOUCHERS FOR $50 EACH 
 Red Lead Paperworks - 3 prize packages - stamps, stencils, collage sheets 
 iStencils - $25 gift card to website 
 Brush Magazine - 2 winners: two ’bundles’ of 5 issues of the magazine - digital copies 
• 7 Dots Studio - prize pack 

SUPPLIES USED in my project for the "Our Favorites Mixed Media YouTube Hop - Art Journaling Edition": art journal • vintage book paper or color copy of book page • gesso/acrylic paint/glazing medium mixture • sticker letters • Stabilo Woody pencils {black, white, gold, silver, & purple} • Stabilo aqua pencils {black, white, red, yellow, blue} • Stencil Girl Stencils • The Crafter's Workshop stencil {Rebekkah Meier Designs} • Clear embossing powder • Blue Pigment ink • Faber Castell Black Pitt Brush pen • White Gelly Roll pen • EK Success Cutterbee scissors • Police Box Stamp {from vlvstamps.com} • glue stick • Punchinella {from Gauche Alchemy} • Ranger Distress Paints {Salty ocean, cracked pistachio, wilted violet, twisted citron, tarnished brass & salty ocean} • Golden Fluid Acrylic & High Flow Acrylic Paints {Green Gold & Indigo} • makeup sponge • pencils {black, white, red, yellow, blue • EK Success Honey Bee scissors • Ranger Dina Wakley White gesso with detail tip • paper towel • DIY mono printing plate made of Amazing Mold Rubber • water brush. 

**Giveaway is not endorsed by or affiliated with YouTube. All prizes are provided by individual artists or companies. No purchase necessary to win.

I hope you have a creative weekend and enjoy my WHOvian adventure in art journaling! :) Sb

Thursday, September 22, 2016

We're all #Cre8time Mad Here... Designer Crafts Connection Gel Press® Bloghop


Hello everyone! Today the Designer Crafts Connection takes on a new challenge featuring monoprinted creations using the Gel Press® reusable gel printing plate. These are easy to use and so much fun for art enthusiasts of all ages.


For this challenge, Gel Press® provided each of the Designer Craft Connection designers with one of the Gel Press reusable gel printing plates. I have tried other variations at workshops, though I haven't tried out the Gel Press. I really love the 5" x 7" size as it's perfect for my smaller size art journal pages.


Along with the Gel Press® plate, I gathered some old book pages, letter and pattern stencils, punchinella, some texture plates made from Amazing Mold Rubber, a prepared cast resin embroidery hoop, Speedball brayer, Mod Podge, a few Ranger Distress Paints and Golden Green Gold fluid acrylic paint. I also need a pencil, scissors, Diamond Glaze, and a couple markers. The resin pumpkins are a separate project, though I need to paint up enough papers for collaging them in the same color scheme.


I set out the Gel Press® plate onto a cutting mat from the Dollar Tree {these work great for a protective work surface}. The Gel Press® plate sticks itself to the surface and stays put while you are moving your paint around with a brayer. I apply some Cracked Pistachio Distress Paint to the plate. I like using the Distress Paints for monoprinting as they are a little bit wetter than regular acrylics which allows me a little more time to work with while creating patterns in the wet paint.


I spread out the color evenly with my brayer then pressed my mold rubber texture plate into the wet paint. I pressed evenly across the plate then peeled back to reveal this beautiful circular pattern taken from a vintage decorative plate. I pressed the paper onto the Gel Plate® to transfer my first painted layer. I repeated this several times to make five sheets of paper that will all be similar when I'm done.


The second layer from the Gel Press® will be Mermaid Lagoon Distress Paint with this awesome punchinella design that I got from Gauche Alchemy. It gives a pattern that is a cross between a floral and an animal print. I am really loving how easy this is and how this is coming along! 


Of course you know I have to have purple... the third layer is Wilted Violet Distress Paint combined with a Tim Holtz mini Damask Stencil {THMST004 mini stencil set 4}. 


With the smaller size of this stencil, I needed to work quickly. I pressed the stencil onto the painted Gel Press® then rubbed a scrap section of paper to remove paint in the negative areas. I removed the stencil, then repeated two more times to completely cover the plate with the damask pattern.


This is the result of the third pull. The colors and variations of layers and texture are so interesting... and my recycled book pages are totally transformed into beautiful art. In about a half an hour, I have 5 finished matching patterns and a whole bunch of starters as a result of cleaning off brayer and leftover paint on the plate and stencils.


I select one of the finished Gel Press® printed papers and prepared my resin frame for mounting to this custom word art. FIRST I need to add some stenciled and hand written words... it's much easier to do this before mounting the frame.


I place the frame over the section of paper I want to use and I trace around the inside and outside edges of the frame with a pencil. This is so I can see where I need to center the lettering going forward.


Since I'm combining my hand writing with stencils - I go ahead and plan it out in pencil on a scrap of paper first. This is just for my piece of mind. For "embrace" I used a Tim Holtz ths011 Schoolhouse layering stencil and for "your" a generic lettering stencil from the art supply aisle at Michaels.


I traced the letters with a Black Sakura Pigma™ FB pen. The nib is a small size brush tip and it fit perfectly through the voids of the stencils. I added my freehand "crazy" then went back building up and filling in the letters with the pen. I also added a little doodling and flourishes. I blended out a bit of Seedless Preserves Distress marker in from the edges to add interest. I cut the circle out following the traced line of the outer edge of the frame.


I wouldn't have normally painted the backside of this resin piece - though I had a bit of a paint craftastrophe with the purple dauber top and had paint all over my hands so I rubbed some off on the frame, some paper and to my resin pumpkins. I ran a line of Diamond Glaze around the edge to adhere to my lovely word art.


I press down gently to adhere edges and let dry for a few minutes. Then I go and back trim any excess with scissors. I think I will add a sheet of self-adhesive magnet to the backside to finish this off so I can also hang it on my fridge.


I tied off a section of hand-dyed sari ribbon. BEA-U-TIFUL!!!


I love how the Amazing Mold Rubber picked up every tiny detail of woodgrain from the vintage embroidery hoop casting.


Embrace Your Crazy!


CLICK HERE to jump over to the beginning of the Gel Press® Bloghop at the Designer Crafts Connection blog and find more ideas of what to do with a gel printing plate!

To learn more about Gel Press®
For even more ideas also check out the Gel Press Facebook page!

+ + + + + + + + + + + +

Thanks so much for visiting! For more +++++ inspiration visit the Designer Crafts Connection "Gel Press®" bloghop HERE. Sb :)

** This is a sponsored post. Gel Press® has provided a Gel Press® reusable gel printing plate in exchange for my creative ideas, views and opinions. My ideas and opinions are my own.

Friday, May 8, 2015

Say a SPECIAL Thanks for National Teacher's Day...


Greetings Friends! In a couple weeks school will be ending for summer break and I wanted to make a special gift for the teacher. If you search Pinterest there is a plethora of ideas - it's quite overwhelming. I found loads of fun ideas that I can do with stuff I have on hand that sent me off to the studio to rummage through my scrapbooking stash.


I'm sharing a quick and easy handmade Teacher appreciation gift with items you have in your craft stash, a Deflecto Craft Frame and Wet-Erase Markers. This project can be done in about an hour, the kids can even help, and the best part... it's re-usable and interactive, too!

For more information on the Deflecto line of products,


This month the Deflecto USA Ambassador Design Team is sharing a variety of projects Teacher's as well as for Mom's, Dad's and Grads using Deflecto Craft products so you'll want to CLICK HERE to jump over to the Deflecto Craft Facebook Page or Deflecto on Pinterest to see more of the teams creations.


For this project I used the 8 1/2" x 11" Deflecto Double Sided Portrait Frame Item #879201. A heavy-duty, two-sided clear frame featuring durable acrylic - this holder is tough enough to withstand frequent use... perfect for a busy teacher. It couldn't be easier to fill and decorate. I trimmed a black sheet double-sided scrapbooking paper to size and layered a large heart doily over the top.


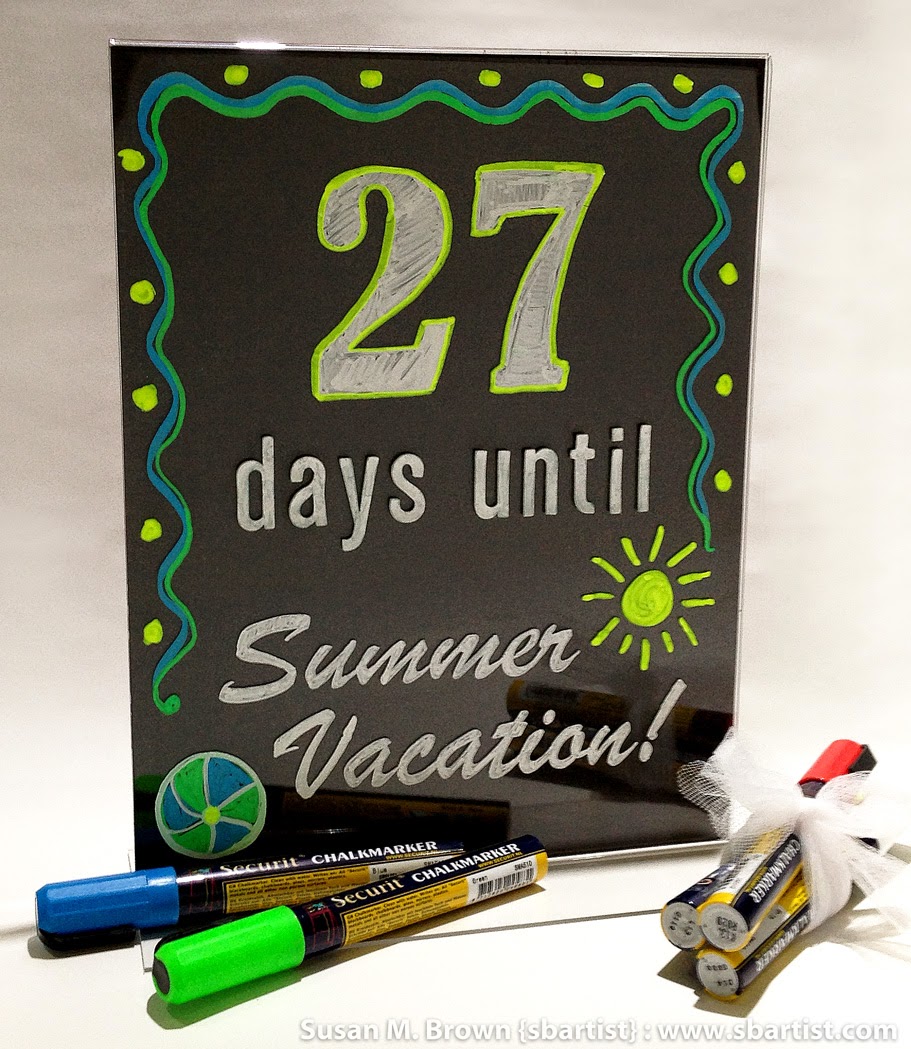
My penmanship is not what it used to be so I did a little creative cheating - but it was more for being a SUPER TIME SAVER! I picked some fun fonts and printed out my text on the computer sized to fit the frame. I placed the printout in the frame and traced around the letters and colored them in using the non-smearing, fast-drying Deflecto Wet-Erase Markers. I have to admit this totally looks store bought.

I completed one side and let it dry completely before penning the other side. I recommend working upside-down and from left to right - it seems alien to do it this way, but it keeps your hand out of the wet chalk ink as you work.


The only other craft item I used was some American Crafts "Thickers" letter stickers applied to the outside of the frame to spell out "days until". This adds a little dimension and I used up a little something I had on hand. The stickers can be easily removed later if desired.


The great thing about the Deflecto Wet-Erase Markers is that with a quick wipe with a damp cloth, this can be changed and re-used over and over again. The black paper simulates a blackboard and the frame can be changed out to hold photos, calendar or other signage.


The finishing touch in blue - a personalized message.


With a handmade card and tied up bundle of the Wet-Erase Markers... this gift is ready for teacher. Wouldn't your child's teacher love to receive a thoughtful gift like this?

How would you create with Deflecto Craft Frames?

Thanks for visiting! Please join me each month when the Deflecto USA Ambassador Design Team will has a new Deflecto product challenge to debut.  :) Sb

For more information on the Deflecto line of products,

Monday, November 24, 2014

Toorkey for Tacos! Elf is Cookin' Up Trouble with Deflecto Wet Erase Signs


Greetings Friends! It's the last Monday of November and time for another Deflecto USA Ambassador Design Team Challenge. This month's Challenge theme is "Fanciful Frames". I will be sharing a couple of posts this week sharing a variety of Deflecto Frames, Signs and Wet-Erase Chalkboard Signs which are sleek and modern, yet so much fun!

For more information on the Deflecto line of products,


This month the Deflecto USA Ambassador Design Team is sharing a variety of creative and imaginative uses for the Deflecto "Fanciful Frames" challenge so you'll want to CLICK HERE to jump over to the Deflecto Craft Facebook Page to see more of the teams creations.


My first project sets the scene for my first official "ELF" prank starring my handmade SCOUTIE Elf. She is cooking up trouble in the kitchen during Thanksgiving preparations trading off turkey for tacos - LOL!


The Deflecto Wet-Erase Sign Item Number MINI-M-KR is perfect for adding a sign in a snap! These cute Black signs mounted to a Mahogany easel come in a three pack and measure 5 7/8" x 9 1/2" x 5 1/4".


I created a fun Mexican themed sign using the assorted color pack of Deflecto Wet-Erase Markers - the colors are vibrant and matched my decor and papier maché bull perfectly.

Ready for MORE??!

I am in a group online called The Documented Life Project where there are loads of talented artists sharing their work using the weekly prompts. I was inspired to display this C.S. Lewis quote that had been beautifully illustrated in an art journal spread created by artist Sherrinda Williams Ketchersid. My penmanship is not as nearly as nice as hers, though my rusty modified calligraphy worked nicely with the chiseled tip of the Deflecto White Wet-Erase Marker.


For this project I used the double-sided Deflecto Wet-Erase Sign Item Number ELE-M-ME - a beautifully designed, 7 7/8" x 9" x 2 3/8" Black removable sign mounted within a Mahogany base. The removable sign makes message changes easy using the non-smearing, fast-drying Deflecto Wet-Erase Markers.


The Chalk markers clean up quick and easy with a wet paper towel and water, then followed with a dry cloth - and they leave no ghosting. The ink is opaque and bright and does not require multiple coats - that's a timesaver.


The black board of this display is stiff and durable and can take the wear and tear of lots of erasing and re-decorating. I put it to the test, too... I started and erased quite a lot more writing than I kept!

Inspiration that's right at Home!


I added a little decorative black and white washi tape to the wooden frame to help balance all the black and white... it did the trick. Best part - the other side is ready to go to make a list, jot down reminders or add another inspirational quote. CLICK HERE to jump over to the Deflecto Craft Facebook Page to see more creations to inspire you with Deflecto "Fanciful Frames".

How would you decorate with Deflecto Wet-Erase Signs?

Thanks for visiting! Please join me the LAST MONDAY of each month when the Deflecto USA Ambassador Design Team will have a new Deflecto product challenge to debut.
 :) Sb

For more information on the Deflecto line of products,