Translate

**If you have previously subscribed to received my posts via feedburner or Bloglovin, those are inactive now. To receive my creative updates, please subscribe in the right sidebar.**
Showing posts with label greencrafting. Show all posts

Thursday, November 13, 2025

NO-BAKE Gingerbread DIY Holiday DECOR... Day Four of the Gingerbread Crafts Hop


Welcome back creative friends!. It's DAY FOUR of the Gingerbread Crafts Hop and we're halfway there! Did you enjoy Janet's festive Shrink film earring tutorial? TODAY, Christie of @ritzy_parties is up on her INSTAGRAM acct sharing her take on the viral make of the season... and it's EASY-AS-PIE!

NO-BAKE Gingerbread Holiday DECOR!


Recycled cardboard boxes are magically transformed into a sugar coated row of holiday houses, fit for Candy Cane Lane.

The Gingerbread Crafts Hop is SIX days of crafty Christmas fun for everyone! November 10th through Saturday, November 15th myself along with my Creative Friends will share a gingerbread themed creation – every day filled with sugar, spice and EVERYthing NICE!

Follow along with us on INSTA to see some crafty inspiration! Please be sure to Like, Comment, Follow and Share the creative spirit!

Monday, November 10th – @juanitascasita Jane Rudolfo Shouse
Tuesday, November 11th – @sassyeyedsusan Susan M. Brown {sbartist} **THAT'S ME**
Wednesday, November 12th – @tryit2likeit Janet VanLone Trieschman
Thursday, November 13th – @ritzy_parties Christie Troxell
Friday, November 14th – @makeablecrafts Meg Daves
Saturday, November 15th — @ernavandyk Erna van Dyk

See you tomorrow for DAY FIVE... Meg will be sharing her Sweet Make with you tomorrow!!

;) Sb 


Monday, November 10, 2025

A Cold Snap in November... brings Gingerbread Wishes!

Still enjoying all things PUMPKIN Spice?? It's time for a rare November cold snap in SOFL. It must be a daydream?! 
 
Actually this time it's true... I'm counting the minutes and my Bumble Slippers are on standby, hot cocoa and marshmallows ready and the holiday music going because it's the most wonderful time of the year – Handmade Holidays! I love, love, LOVE making all the sparkly things and this year I am starting early thanks to my group of Creative Elves.


The Fall-o'Ween Crafty Crawl was so much fun – we're doing it again with Gingerbread Crafts! To get you excited for our SWEET Seasonal event I am doing with some Artsy Pals this week... enjoy this festive stamped card with a snarky twist.

YOU DO NOT want to miss
the kickoff of Crafting Season!


Our Gingerbread Crafts Hop is SIX days of crafty Christmas fun for everyone! Each day beginning Monday, November 10th through Saturday, November 15th myself along with my Creative Friends will share a gingerbread themed creation – every day filled with sugar, spice and EVERYthing NICE! My project will be revealed on DAY TWO, November 11th!

Follow along with us on INSTA to see some crafty inspiration!

Monday, November 10th – @juanitascasita Jane Rudolfo Shouse
Tuesday, November 11th – @sassyeyedsusan Susan M. Brown {sbartist} **THAT'S ME**
Wednesday, November 12th – @tryit2likeit Janet VanLone Trieschman
Thursday, November 13th – @ritzy_parties Christie Troxell
Friday, November 14th – @makeablecrafts Meg Daves
Saturday, November 15th — @ernavandyk Erna van Dyk

Monday Jane at @juanitascasita kicks it off the event… be sure to visit her INSTAGRAM acct to see what she's baking up in Gingerbread Land. I'll drop some reminders each day too!

Thanks for dropping by today. I look forward to sharing a creative week of Sweet Makes!!

;) Sb

Thursday, March 10, 2022

Pinch Me... I'm ShamROCKin' a DIY Ribbon Rosette #NationalCraftMonth


Hello friends... March is National Crafts Month and St. Patrick's Day is right around the corner! Today I'm sharing a quick and easy ribbon rosette project that is perfect for pinning on the winning float at the annual St. Patrick's Day Parade!


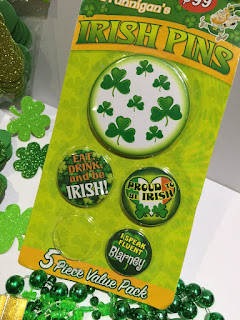
For this project I gather a few supplies: gold oly*fun® metallic fabric, scrap of green cardstock, scissors, paper trimmer, hot glue, Scor-Pal®, double-sided adhesive sheets; and fun Irish themed button flair, embellishments and stickers from my fav dollar store.


I have these pins from the dollar store in my crafty stash that would be perfect to transform into ribbon rosettes using gold metallic oly*fun® -- a fun reflective fabric that adds the perfect amount sparkle & shine to cardmaking and other craft projects!!


To make fabric a bit stiffer to fold and hold shape, I mount to green cardstock.


On a scrap of 6" x 9" green cardstock, I placed a cut-to-size section of double-sided adhesive sheet, removed backing, then mounted piece gold oly*fun® and trimmed back the edges.


Following pattern for making rosettes using my Scor-Pal®, I scored both sides of the paper-backed fabric to create peaks and valleys at 1/2" increments.


I divide this scored sheet into three, 2" sections, With some double sided tape, I joined the three sections together into one long strip. Fold back and forth on score lines to make the accordions. When shaped this will make a large rosette to set off my 3" button!


Now the fun begins! Shape the according into a circle and glue in place. It seems to take about 4 hands to form and hold a rosette down to secure, but once you do it a time or two it's pretty easy. For this I apply a ring of hot glue around the edge in the center and placed a faux gold coin on top... Ta-DA! Hold coin in place until glue cools and it is secure then repeat on other side.


I fashion a ribbon tail out of another section of oly*fun® backed cardstock, a smaller section popped up on chipboard cut on my guillotine paper cutter... easy-peasy! Glue the feature button pinback onto the front of the rosette, and added some fun foamy & glittery shamrock stickers to finish things off. Place a sticky back wall hook on the back upside-down and it's ready to hang on the winning float!


I just love the shimmer and shine of the metallic oly*fun®! I can't wait to be ShamROCKin' this over to award to my favorite float at the St. Patrick's Day Parade!

A ShamROCKin' Award....


What are you creating during National Crafts Month?! I'm enjoying the art of cut paper and glue over at the Collage-Lab SPRING FLING Virtual Retreat... you can still join the fun -- all classes are accessible until December 2022.


Thanks for stopping by and have a great day! Clover on over to the Designer Crafts Connection blog for more fun craft ideas!

Happy creating! :) Sb

Thursday, August 12, 2021

Fantastic Foiling with Ann Butler Designs + Designer Crafts Connection!


Greetings everyone -- hoping everyone is having a SPARKLY day! The Designer Crafts Connection is having fantastic fun with Ann Butler Designs and heat transferrable foils... and I am totally addicted! 


CLICK HERE to hop on over to learn more about these fabulous products!


I was provided this sampler pack of 6 Ann Butler Designs Floral Patterned Papers with 6 solid toner papers and 6 sheets of foils and an assortment of sentiments for which to create with. 


Everything is so beautiful... one of the foils is looks like clouds!
I'll be using that one on another project.


I need a gift box for this weekend and I have the perfect item to upcycle. This gourmet tea came was given to me as a Christmas gift and the box is a lovely quilted embossed paper with tags that have gold foil accents. 


I'm going to use the Ann Butler Designs floral patterned paper foiled in gold to cover up the product labels and use this for a beautiful silk scarf. I will also foil the "thinking of you" sentiment in the green foil to serve as a gift tag.


I was so excited to be able to use my Minc machine which has been sitting on the shelf unused since I got it about 5 years ago (totally forgot I even had it). WOW! I have been missing out! I also tested out foil transfer process using my Cricut mini iron which worked also (though you do need to test to figure out process with your materials first). I'm using my Minc on setting 3.


With gold foil layered on top of floral vine patterned paper placed inside of transfer folder made of copy paper, I sent it through the Minc. I repeated twice for good measure since I'm new to this process and machine.


Ready for the magic!


The black vine design is now GOLD!


A close-up! So luxurious and easy to do! Having worked in the printing industry for over 30 years - this is an expensive, labour intensive process that is not done this way. 


I am in love and it gets BETTER! The waste is usable too! Place the remaining gold foil waste on top of the solid black toner cardstock and run it through the Minc... you get another piece for another project! YIPPEE!


Here are the papers I foiled and the reverse. Stay tuned... I have another project in the works for the blue versions.


**A TIP** I gently cut the foil with my mini guillotine cutter. The foil is really delicate -- next time I will just use scissors as it nearly tore in the process.


I prepared and sent these two sentiments together through my Minc.


The hardest part is measuring and back-trimming the pieces to fit within the existing gold-foil line on the packaging. 


I made each of the sections slightly larger and trimmed off a sliver at a time to get it just right.


I didn't need to do this, but I am all about the tiny details. I used a Gelly Roll metallic pen to touch-up about a 1/2" section of the original gold foil line that was missing from storing tasty teas. Voila!


Now with all my pieces cut, its time for the FUN part... embellishing!


I add glue and gently press into place.


Then repeat with the other sides.


Repeated the steps to mat the sentiment onto a piece of DCWV green glitter cardstock.


Add a few REMOVABLE Glue Dots® to the matted sentiment...


And apply to the front of the box. Smart of me to use removable adhesive -- I put the sentiment on the wrong side of the box LOL! 


Recipient can remove easily and use box again.


Save those gorgeous scraps! There's plenty of pieces left to use on a card.


Look at that! A perfect match. Nobody will ever know that this is a recycled tea box.


A Recycled Gift Box Redux

This gift is ready to grab and go! What pretty packaging do you have waiting to upcycle. 

These fabulous papers embellished with heat transferrable foils are quick, easy and luxurious!

CLICK HERE to jump over to the beginning of the Ann Butler Designs Foil Bloghop at the Designer Crafts Connection blog to view more inspiration and projects using heat transfer foils. 


Products on her Website HERE


Thanks so much for visiting! Sb :)


** This is a sponsored post. Ann Butler Designs provided paper products for use in this project in exchange for my creative ideas, views and opinions. My ideas and opinions are my own.

Tuesday, April 16, 2019

Ready for a Weekend Getaway... DIY Bloghop with Expo International Trims


Hello Friends! Are you ready for a weekend getaway?! I know I am! Today I am proud and grateful to be participating in a special DIY Spring Bloghop with Expo International Trims. I have a couple makes using Expo International trims: a pencil case turned Chic clutch and a wintery felt phone holder.


With some scissors, double-sided adhesive and Fabri-Tac ~
making a seasonal quick change is quick and EASY.


Expo International sent me this selection of items to create with. Keep an eye out here on Cinco de Mayo as to what becomes of the festive fringe and red trims. TRIMS USED in this project: Shell Beaded Denim Trim - Black Multi; AnnaLie Jute Trim {natural burlap background with cotton lace overlay}; Evelyn Black Lace; and striking Flower Brooch.


I shopped my closet and gathered some canvas, white, black and khaki - my travel go-tos and grabbed some items that need some travel ready flair.


First up - my not so girly yet functional fishing hat. I removed the leather straps and measured a section of the lacy jute trim and lined with double-sided adhesive. Remove the backing, wrap around and VOILA ~ instant transformation!


My canvas tote has a stain that won't wash out. What's a girl to do?! Camouflage it by adding some Expo International Trims of course!


Adding lace trim is quick and easy with Fabric-Tac.


I love to double layer contrasting trims... 
and it makes the trim look like it's all-in-one.

How did I get these great boho roses?!


I made them out of Expo International Trims!


I had a small section leftover of the lacey jute trim. It's not going to waste. I gently peeled back the lace to expose the threads and gently cut apart.


Now I have two separate pieces! I wrapped these wonkily into a rose shape, added a pearl to the center, and secured with Fabri-Tac.


I cut the burlap into strips, added a strip of double-sided adhesive tape, then backed onto this beautiful distressed denim trim with shells and wound it up into another boho rose.


Again - secured with strategically placed dollops of Fabri-Tac.


I added a broken clip-on earring to the center of this one.

A little more Fabri-Tac adheres them to the jute trim band.


An easy-peasy transformation from stuff I had around the house. AND I can easily remove and re-attach my leather strap for the pop-up fishing excursion.

But there's one more....

This natural woven purse is beautiful as it is... but it needs a little something.


After the addition of Expo International Black Lace trim and this gorgeous Adornments Clip-on Brooch!!! 


Instant STYLE!


What would you transform
for your travel getaway with
Expo International Trims?

CLICK HERE to POP over to the Expo International BLOG for other projects in this special Spring Bloghop with Expo InternationalFor more information on Expo International and products to dress up anything please visit website HERE.


Visit Expo International on FB www.facebook.com/expointl to enter for this great giveaway of trims.

For more inspiration on creating with Expo International please visit www.expointl.com/blog/. Share your creations #expotrims #diyhomedecor #embellishwithexpo 

Thanks so much for visiting! Sb :)

** This is a paid sponsored post. Expo International has provided trims for use in this project in exchange for my creative ideas, views and opinions. My ideas and opinions are my own.