Translate

**If you have previously subscribed to received my posts via feedburner or Bloglovin, those are inactive now. To receive my creative updates, please subscribe in the right sidebar.**
Showing posts with label favors. Show all posts

Monday, October 3, 2016

#PumpkinSpice and Everything Nice... fun DIY #Cre8time Thanksgiving Treats!


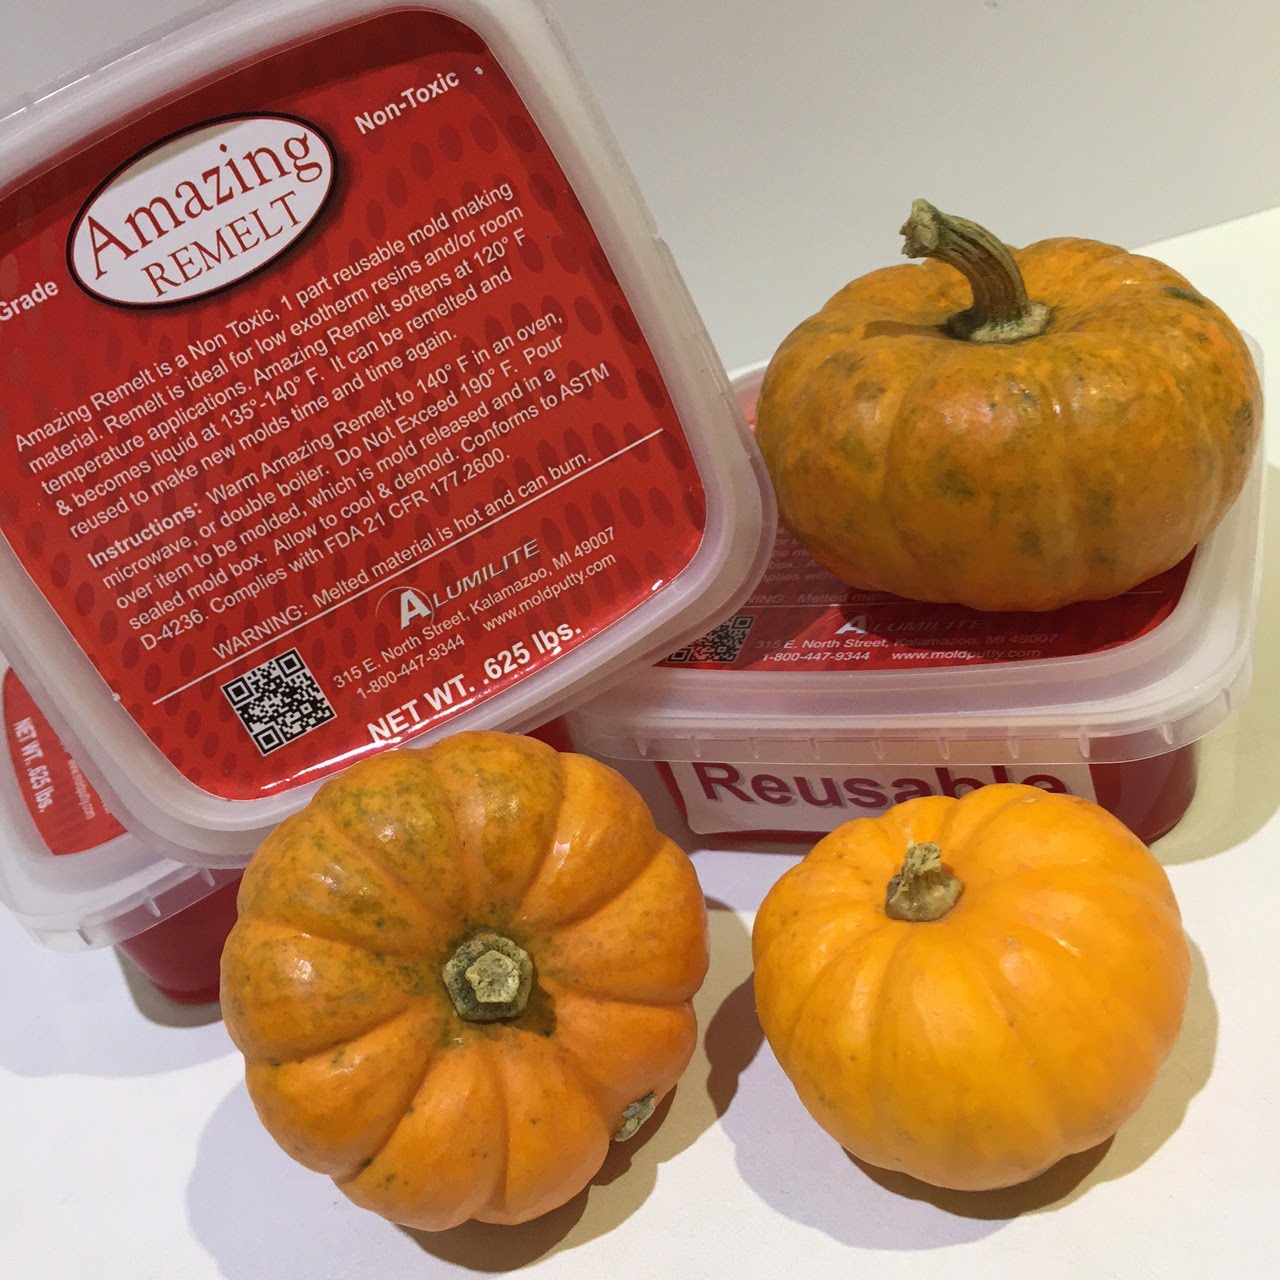
Happy October friends!! It's another first Monday and myself along with the Designer Crafts Connection are sharing fabulous Fall Crafts. Today I'm sharing some fun DIY treats for your Thanksgiving table settings. I admit I'm crazy for pumpkins... especially those adorable mini pumpkins!! I made a couple molds for molding chocolates and other sweet treats using Amazing Remelt, and Amazing Mold Putty {both are food safe}.  


Amazing Remelt and Wilton Candy Melts both melt down in minutes in the microwave making custom sweet treats like a pro quick and easy.

First I selected a tapered glass bowl deep enough to fully cover my pumpkin, then melted down a container of Amazing Remelt using the lowest setting on my microwave in thirty second increments until it was completely liquified.


Please click here if you have trouble viewing video.

**A TIP** I poured a small amount into my bowl and let cool a bit before placing pumpkin in it. ALSO, I dipped the top of the pumpkin into the liquid remelt to coat the stem and let any air bubbles release before fully covering with Amazing Remelt.


After cooling in the refrigerator for a while {I left it all day since I had to go to work}, I removed the mold from the bowl. I gently cut the mold in half using a sharp Xacto knife and released the pumpkin. Now I'm ready to make some chocolate mini pumpkins.

First a solid chocolate pumpkin...


I melt down the Wilton Candy Melts following the directions for microwave in a pourable pyrex measuring cup. I scooped the melted chocolate with a small spatula into both sides of the Amazing Mold Putty mini pumpkin, filling completely.


I placed the top half of the mold onto the bottom, aligned to my marks and placed in refrigerator to chill and harden. Any edges are easily touched up with a light scraping with a spoon or backside of a butter knife.


Now I'll make a chocolate pumpkin box...


I repeated by filling the Amazing Remelt mold with the Wilton Chocolate Melts - spreading chocolate to evenly coat edges and leaving center open. When hardened this pumpkin will be hollow... perfect for desserts or party favors!


The chocolate hardens very quickly – then I gently remove from mold, set aside on a tray in the fridge and make another set. I fill the chocolate box with an assortment of roasted seeds/nuts and mini dark chocolate chips. These lovely white mini pumpkins make a perfect edible favor for the Thanksgiving Day the table settings. These are fun to make and can make well in advance of the event... can you imagine how fun they would be in colored chocolate too??! 

What will you like to
transform into edible art??

If you are pumpkin crazy like me... stay tuned!! This pumpkin baby has more projects in the works. Thanks for visiting! For more Fall and Halloween inspiration pop on over to the Designer Crafts Connection Fall Crafts roundup HERE. :) Sb

Monday, March 2, 2015

Teatime Inspired... You Can Make It Yourself Bloghop with Designer Crafts Connection


Hello Everyone! Today is the first monday of March which brings another Designer Crafts Connection Bloghop... celebrating National Crafts Month! Our creatives are sharing projects that "You Can Make it Yourself" and techniques to inspire you to get crafty all month long. I have loads of pins to try to keep me busy for a lifetime {and then some}... but for today's project, I decided on something that has been on my handwritten crafty list of "things to try".


I'm sure you've seen this one around! This papier maché tea cup tutorial by Ann Wood {CLICK HERE to view} is all over Pinterest and the web - I have been wanting to make these for ages. Ann is so wonderful to provide a fabulous tutorial - and - she also provides a downloadable template, too! THANK YOU Ann for sharing! This project is perfect for using up scraps, ribbon and embellishments that are too small for other makes.


I have a bin with paper scraps, small pieces of ribbon and other bits and bobs leftover from other projects which I shop when starting new projects. I had a four leftover mauve floral paper scraps from another project {3" x 12" strips} which made for a great base to make a set of four tea cups. I collected up some coordinating washi tape along with leftover ribbon sections, beaded trim, lace and my tacky glue. I downloaded and reduced the pattern to fit on my paper strips; cut out pattern and traced onto my papers. After a few brief minutes of fussy cutting {really super easy}, it was time for assembly.


I took a few liberites with the instructions: I reduced the pattern to fit my paper scraps and I skipped the traditional papier maché as per the tutorial. Instead I taped the inside of the cups together with loads of strips of washi tape... a cool grey and a teal polka dot pattern - two cups lined with each. I rubbed all the edges with Antique Gold Dew Drop ink, then layering ribbons and trims to each cup. I finished the cups with a sealing of Mod Podge on the inside so the washi tape will not peel up.


Isn't this so stinkin' cute?!!

These were so fun and easy to make - I made a set of 4 while catching up on a couple TV shows spooled up on the DVR. I could see a whole tree covered in these mini teacups for the holidays. They would make great place cards and favors for a bridal shower or dessert party, too.

"Time for Tea"


Thanks so much for visiting! Continue on the Designer Crafts Connection "You Can Make It Yourself" Bloghop by selecting hop back/forward on the logo below to enjoy all of the wonderful inspiration. Happy Creating! Sb :)

Tuesday, August 5, 2014

Taking #Cre8time Back to School...
Designer Crafts Connection August Bloghop


Welcome! It's the first Monday of August which marks the monthly Designer Crafts Connection Bloghop. This month's theme is "Back to School"... crafting with school supplies - who can resist. I always loved this time of year - getting new crayons, pencils and other crafty school goodness... and I still enjoy stocking up on my stash of glue sticks and getting a new composition book to doodle and sketch in.


Using a handful of supplies, I have created some fun Back-to-School treats for my nieces. I'll admit I had loads of fun making these... maybe even more than the girls will have! 

Supplies used: scissors; push pins; binder clips; mini pencils, party favor stencils; ruler stencils; mini composition books, brown kraft shipping paper; standard notebook paper; black dye ink; Sakura of America Gelly Roll® Stardust® pens; pencil sharpeners; mini erasers; clear rubber stamps to coordinate; glue stick; circle and medallion punch; Herma Dotto adhesive runner by EK Success; and black marker.


I set out to make some of these plain utilitarian items fun and colorful. I added some rainbow colored mini DUCK Brand tape to the binder clips. This is so quick and easy and gets the WOW factor!! I grabbed a couple punches and scrap cardstock to create custom seals with the year drawn in stencil numbers. Lastly, I cut some squares of brown paper for shipping to make "brown-bag" covers for the mini composition books.


We all remember back in the day when we had to cover our schoolbook with brown paper bags... right??! How about a little mini covered composition book! It's so stinkin' cute... and screams for doodling and embellishing.


School supplies are so much fun and when I spied these mini erasers - I had other plans... making mini stamps. I layered some squares of chipboard onto a pushpin for shims and layered two erasers of the same shape on to create a cute little stamp. I could go even further and come back and make others and carve away the colored detail to make a whole set. But these are perfect for what I want to do.


Using a single sheet of notebook paper - I cut off about 4" from the bottom. I took the binding edge and folded that in half to the pink margin line and ran a line of dotto adhesive; making sure to skip over the holes. Then I folded the sheet in half and took the right edge, aligned it flush with the left and pressed in place on the adhesive. Now I have the closed sack - it just needs the bottom folded and closed up. I folded the corners in to make some score lines then opened it up and reverse tucked them inside and folded the outer two flaps over like flaps of an envelope. A small line of Dotto adhesive on the top flap holds it closed.


Easy-peasy! Four little mini notebook paper
treat bags ready to decorate.


Now that the treat bags, book covers and new mini stamps are completed... it's time to play! I set to work playing as I embellished the cover of the book and treat bags using my new mini stamps combined with doodling with Sakura of America Gelly Roll® Stardust® pens and some Hanna Montana clear stamps {I've been hoarding these for ages}.


In retrospect, I might glue two sheets of notebook paper together {side-by-side} so that I could create a larger treat bag. With the brown paper cover on, the book no longer fit in the bag... which was OK because I had plenty of goodies to completely fill the bag! I could tie the two together with some fun colorful shoelaces or book bands.


I think my nieces will be pretty excited to receive these. They will have a lot of fun doodling and jazzing up the mini composition books covered "OLD-SCHOOL" style.

Thanks for visiting. Continue on the Designer Crafts Connection "Back to School" Bloghop by selecting hop back/forward on the logo below.