Translate

**If you have previously subscribed to received my posts via feedburner or Bloglovin, those are inactive now. To receive my creative updates, please subscribe in the right sidebar.**
Showing posts with label vintage. Show all posts

Wednesday, April 15, 2020

Tea for Two... Designer Crafts Connection Little Birdie Bloghop


Greetings everyone! Today the Designer Crafts Connection is creating using Little Birdie Crafts sharing a variety of projects including scrapbooking, mixed-media and découpage. CLICK HERE to hop on over to learn more about Little Birdie and see all the wonderful creations.


Little Birdie Crafts manufactures Hobby and Craft products for craft enthusiasts from around the world with a mission to spread the joys of crafting. I received this beautifully packaged assortment of Little Birdie Crafts découpage supplies to create with.


To create with are two beautiful designs of Decopage Papers, Deco Magic Decoupage Glues in matte and glossy finish, two MDF 4" Coasters, and Decor Gloss Varnish. Since coaster blanks are included, I will art those up. The designs are colorful and just happen to include imagery that I can make a coaster for in memory of my grandmother and my uncle.


My family being from Chicago... this project would not be complete with a mini découpaged Chicago Cow. On one of my recent trips home I found this plaster cow at the craft store in a clearance bin for 75 cents (it has a horn and part of a hoof broken off). This project will give her a proper artsy makeover! 


One of the decoupage paper packs is  "Post Perfect" which contains two sheets each of two designs. My Grandmother loved to paint flowers so I will découpage one coaster with these beautiful hydrangeas.


The other decoupage paper pack is "Antique Essence" which contains a collage mix of words, florals, butterflies, travel and vintage vehicles. I cut out the VW beetle with scissors and layered to be the focal image on the coaster for my Uncle. He loved his cars and one of his car restoration projects was a VW Beetle. I loved it and when I was young I dreamed it would be mine one day.


Découpage with paper is a simple process, but takes a bit of time and patience. To apply paper to item, you cut or tear papers depending on design, then paint thin, even coats of Decopage Glue to the item and also the back of the paper. Then place glued paper to glued item and use brush to smooth out air bubbles and seal with a layer of more decoupage glue. It's messy fun. For the round coaster, I used scissors to cut segments all the way around so I could fold over and adhere paper to backside making a nice smooth edge. 


I repeated process for the square coaster, but I trimmed the corners away at a 45º angle so the flaps foldover with make a nice finished edge and corners.


I finished folding over the other two edges, added more Deco Magic Decoupage Glue and pressed the backside of the coaster onto a piece of grey felt. I set a bottle of water on top to weigh it down while the decoupage glue dries, then back trim to the edges with scissors. 


For the circle coaster, I found a lid to something in the kitchen that was slightly smaller to cut felt shape and glued on. This finishes off the back nicely!


I tore up pieces of the papers into smaller bits and began décopaging the plaster cow. I selected some florals and images to use on the outer layers and I need to tear these out with precision. I dip a fine tip paintbrush in water and paint close to the edge of desired image, let water set for a few seconds, then press gently to tear where desired. I then adhere these selected images to complete the outer layer of this artsy cow. 


I also used this butterfly that I tore out
using same painted water line technique.


I used some Caran D'Ache pastels to add spots of color to unite the collaged pieces and give an impressionist painterly feel to this colorful cow. Now it is truly a work of ART and will be the perfect companion to my Grandmother's coaster and her blue mug.


I seal both coasters with three thin layers of Decor Gloss Varnish, letting each coat fully dry between application. The varnish may look a little cloudy when applied, but it dries completely clear. I set aside for a day or two to let everything cure completely and my new coasters are ready to use!


Découpage is a wonderful way to transform and personalize pretty much anything -- trays, vases, frames, coasters, furniture... you name it! With these DIY coasters, I also have preserved some special family memories.


Tea for Two!


What would you create
with Little Birdie Crafts?

CLICK HERE to jump over to the beginning of the Little Birdie Crafts Bloghop at the Designer Crafts Connection blog to view more inspiration and projects using products and kits from Little Birdie Crafts.

You can find more info on
at their website HERE

Find lots of creative inspiration on the Little Birdie Crafts BLOG.


Thanks so much for visiting!  Sb :)

** This is a sponsored post. Little Birdie Crafts has provided products for use in this project in exchange for my creative ideas, views and opinions. My ideas and opinions are my own.

Friday, February 2, 2018

Sharing Art from the #Cre8time Heart...


Who doesn't love a brand new bottle of paint?!! Except when it bursts all over the place - YIKES! In an effort to clean up a bunch of spilled paint – I quickly grabbed a bunch of stuff to paint red in a hurry. This beautiful tag full of mixed-media LOVE is what became of my crafty accident... READ MORE  

Hello friends! Today I am sharing some TAG-a-licious inspiration filled with mixed-media LOVE. This tag was born from a Cre8time mess created when opening and testing a new RED distress paint dauber. With some quick thinking, I scooped what I could back into the bottle. Then I grabbed some unpainted goodies that were within reach -- a chipboard heart, a pair of grungeboard wings, recycled book paper and blank tags to quickly use and mop up the remaining spilled paint. I think I was painted more than the items, but it was all in good messy fun!


A few things I've used are leftovers from other projects or from artsy friends. The "beauty lies within" came from a supply box purchased from my creative friend Catherine. This corkscrew topped lady head is from a box of very special stamps from a dear friend from my local altered book group who is no longer with us. This stamp will be perfect to take flight as a mini art doll on this tag.


There was a heart already collaged in this bezel, but I tore it out so that I could add a chipboard piece that was part of my red paint frenzy. I brushed the metal frame with some tarnished brass and red distress paint, then lined the inner edge with some mini red sequin trim held in place with Diamond Glaze.


Everything gets a rubbing around the edges with tarnished brass. This chipboard heart gets a red bling heart before it's mounted into the pendant.


The rest of this came together rather organically -- things just layered up so beautifully as I added scraps and leftover bits from my stash. Layered on the painted tag: a torn scrap of an embossed painted paper, some mini rick-rack, sari ribbon, gold trim and painted lace.


I stamped grungeboard wings with script text. The lady is stamped onto gesso painted recycled book paper, with a touch of color from with distress markers. I add tiny piece of embroidered trim for a necklace... even the littlest scrap of the border trim is put to use!


I finished off bodice with some other goodies in my crafty stash: a beaded dangle; some sari ribbon; fun fiber; and green/red raffia. A work of mixed media love!!!

Have you seen her??


I participated in the "Sharing the Creative Heart" while at Creativation a week ago. This was a collaborative art abandonment project by the AFCI Designer Section, where we dropped our creations around Creativation in Phoenix, Arizona to be found on January 21st. While I was demonstrating, my friend Tracy and her hubs scoped out and planted my lovely lady to be found in the park area at the show entrance. We are all excited to hear where she has landed!

Thanks for dropping by and I hope you enjoy this Valentine's Inspiration! I would love your help in locating where this lovely tag has ended up in the Cre8time world by sharing. Hope you have a creative day!  :) Sb

Saturday, September 2, 2017

Summer #Cre8time Memories...


Hello friends! As summer comes to a close, one can't help but want to remember days adventuring at the beach. I love to create mini-books that house my photos and mementos from vacations... and I don't have to look far for finding something to create with – but for this keepsake... I've raided my pantry and refrigerator!


A set of vintage by the sea stamps by Rubber Dance Art Stamps are inspiration for the theme of my project which will be housed in a recycled cheese box that was in the refrigerator. I also raided my pantry for some paper boxes to serve as a sturdy base for pages.


I began by gently peeling off the package labeling to give me a blank slate to work with.


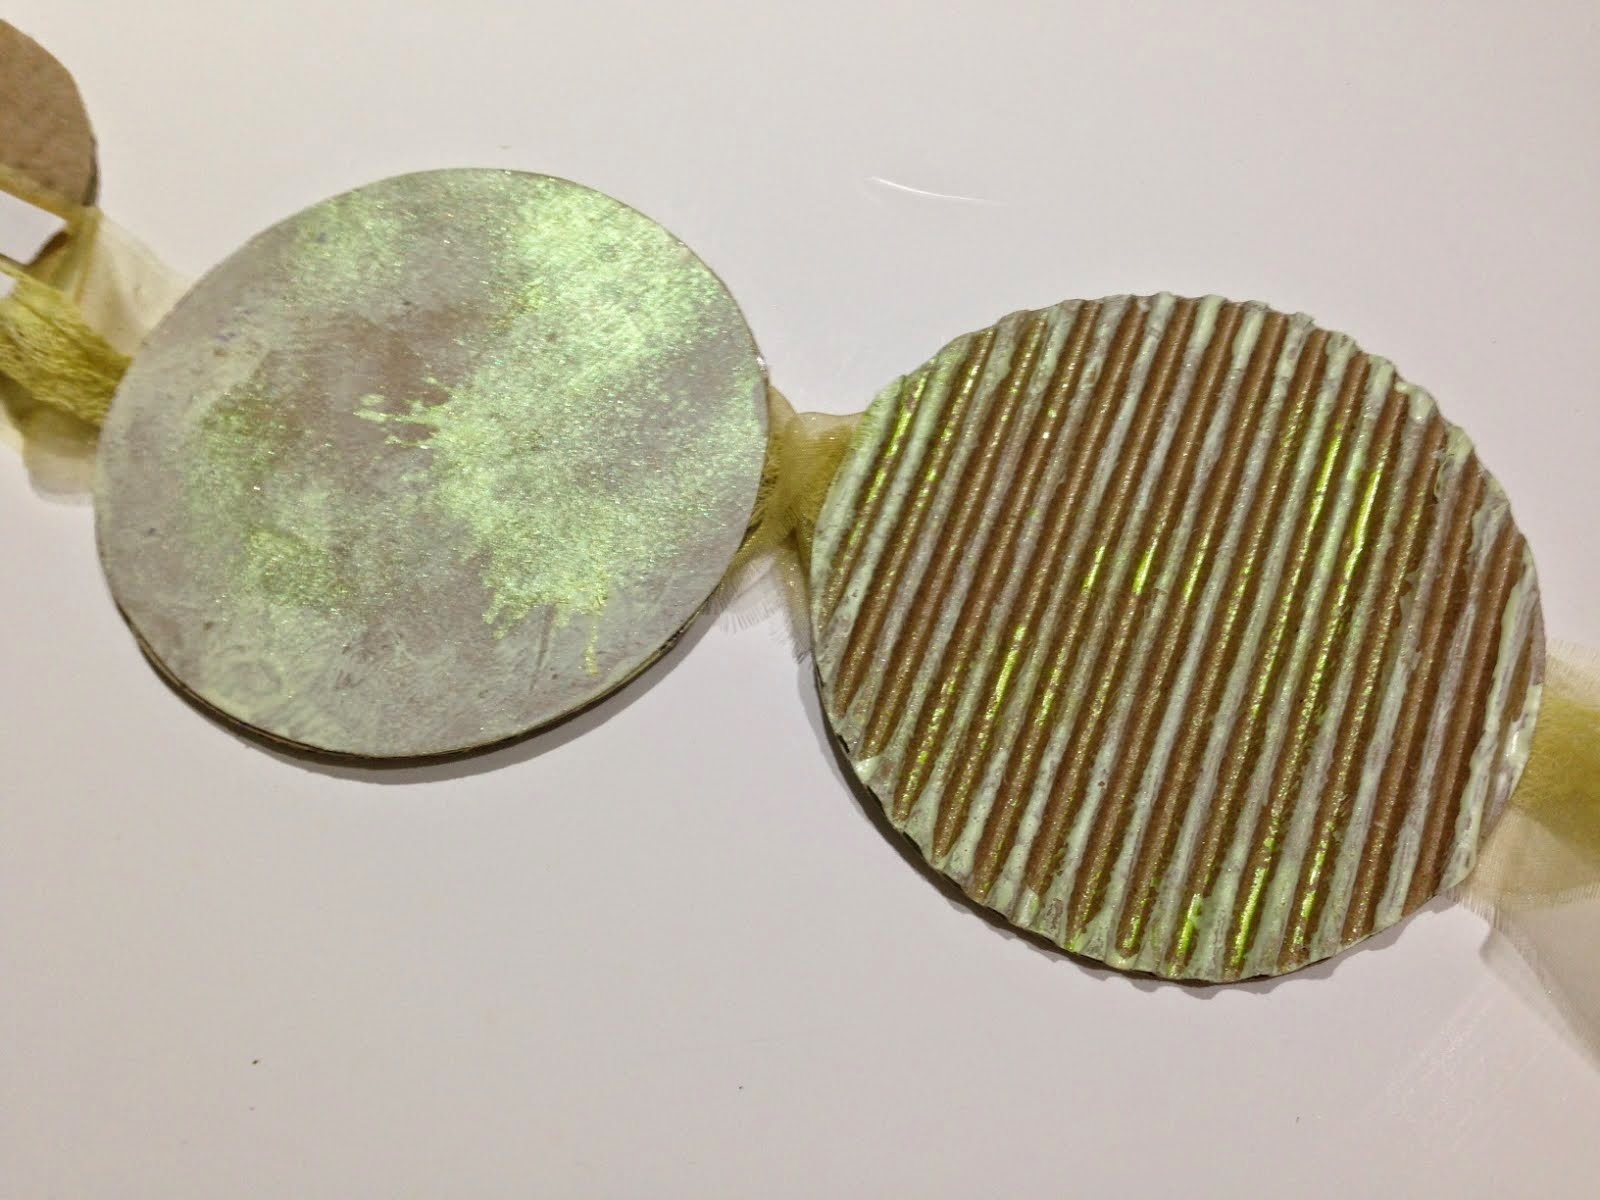
I measured a circle to fit inside the box and cut a template to trace out front and back pages from the recycled cookies/cracker boxes and from the corrugated packaging.


Then I distressed the outside of the box and both sides of the pages with an acrylic/gesso mix and also some spray mists – this gives a real white-washed beachy feel.


I also distressed some sheer organza ribbon and white cheesecloth with distress stains and spray mists... using them to mop up all the glittery goodness from the sprayed pages along the way.


I adhered some double-sided sheet adhesive cut to fit the pages and began to assemble my mini book. I sandwiched the ribbon and cheesecloth between the pages – adding some double-sided tape to the top of the ribbon to lock them in place when I adhere the top page.


Between the pages, I added some knotted natural green dyed raffia.


I even used a recycled envelope for ephemera... nothing goes to waste! I distressed in the same fashion as the pages and adhered using circle cut double-stick adhesive sheets. I'm normally a glue-stick girl, but after all the painting and distressing, the double-sided adhesive makes assembly quick and easy.


I stamped my images using brown dye ink onto creme cardstock primed with the same acrylic/gesso base as everything else; then tearing each image out and distressing edges with chalk inks to complete the vintage weathered feel.


I layered onto the corrogated pages a section of distressed cheesecloth and one image adhered with tacky glue.


I added some antique gold dewdrop ink to the inside of the box and layered one of the images to the base, and blending the hard edge of the envelope and white box with the corrugated border around the sides... WOW this is so lovely!


Now for some finishing touches! A resin cast sand dollar colored with spray mists and antique gold ink; a recycled dry cleaning tag; section of cheesecloth; raffia stands; and some real mini seashells to complete the scene.


I accordion fold the book into a stack and nestle it nicely into the box. It's all grungy and weathered and looks like it's just washed ashore!

Memories by the Sea...


This cheese box has been transformed completely – one would never guess what it was when I began. Keep a lookout in your pantry, the fridge and your recycling for amazing and interesting things to upcycle into something beautiful and useful! I even have space leftover to add some of my vacation photos from Jamaica last fall.

I hope you have enjoyed my recycled stamped creation – I truly enjoyed making this keepsake. What would you recycle for use as a summertime keepsake?

Thanks for visiting! :) Sb

Saturday, February 6, 2016

#Cre8time Beauty Lies Within... For Love of #MixedMedia Bloghop


Hello friends! Welcome to a special bloghop that I am participating in with a group of my creative pals celebrating "For the Love of Mixed Media". Not only are we sharing our passion for all things mixed media... we have projects with a LOVE theme.

If you arrived here in the middle of the hop, you can CLICK HERE to jump over to Christy Strickler's blog who is our hostess and organizer of this Cre8time adventure and some amazing Valentine's Inspiration!


I haven't been doing so much creating lately, though I'm always up for a good challenge and an opportunity to just dump out some stuff and play. I have been itching to use this shield pendant that has collaged paper with a phrase "beauty lies within" {from a supply goodie box I purchased from my creative friend Catherine Scanlon}. I had plans of making a necklace with it and molded up some items to pair with it... but my muse had other plans. 

I also brought out one of my special stamps that is from a dear friend from my local altered book group who passed on several years ago. Her vast collection of stamps were made available for sale to a special group of creative friends and I have about a dozen of her stamps {one of which is this corkscrew topped lady head}. I like to think that when I use these stamps... my muse and my dear friend are having a Cre8time playdate.


There was a heart collaged in this bezel, though I wanted to use a chipboard piece that was a different size/shape - so I had to tear it out. I brushed the metal frame with some tarnished brass and red distress paint, then lined the inner edge with some mini red sequin trim held in place with Diamond Glaze.


The rest of this came together rather organically as I had to paint a bunch of stuff red in an effort to clean up spilled paint from opening the newest RED distress paint dauber. So my chipboard heart, and grungeboard wings, some book paper and this tag were quickly painted red and tarnished brass. I build up the base of the tag with a torn scrap of an embossed painted paper in my stash, some mini rick-rack, sari ribbon, gold trim and painted lace.


The grungeboard wings are stamped with script text and my lady is stamped onto painted book paper accented with distress markers for a touch of color.


Needless to say I think more color is now on my hands than on anything else - LOL! I added a trimmed off piece of embroidered trim for a necklace... I love when those little scraps find a use while I'm assembling things.


I finished off bodice with a beaded dangle that was in my stash o' findings which was a perfect match for this color palette. I topped off the tag with some sari ribbon, fun fiber and green/red raffia. A work of mixed media love!!!

To visit all the other stops of
"For the Love of Mixed Media" Bloghop...
check out the links below.

Our Hostess - Christy Strickler

Robyn Crowningshield

Tina Walker

Katie Smith

Beth Soler

You are here... Susan M. Brown {sbartist}

Lulu Bea

Melissa Johnson 

Thanks for dropping by! Have a creative weekend :) Sb